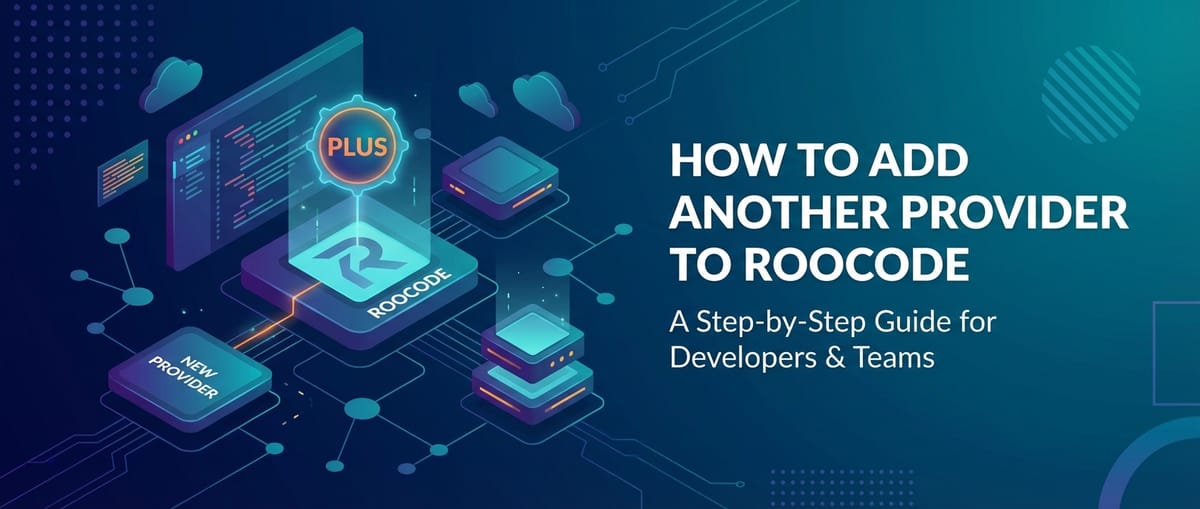
How to Add Another Provider to Roocode

In the rapidly evolving digital landscape, applications are no longer isolated entities but intricate ecosystems interconnected through a myriad of Application Programming Interfaces (APIs). From processing payments and sending notifications to leveraging cutting-edge Artificial Intelligence models, modern software relies heavily on external services. Managing these diverse integrations, however, can quickly become a significant overhead, leading to development complexities, increased maintenance, and potential points of failure. This is where platforms like Roocode step in, offering a sophisticated solution for API orchestration and management.
Roocode, at its core, acts as a powerful Unified API platform, designed to streamline how developers and businesses interact with various external service providers. Instead of maintaining direct, often disparate, connections to each individual API, Roocode provides a singular, consistent interface that abstracts away much of the underlying complexity. This approach not only simplifies the development process but also introduces a layer of resilience, flexibility, and optimization crucial for modern applications. The ability to seamlessly add another provider to Roocode is therefore not just a technical feature; it's a strategic advantage that empowers organizations to enhance their capabilities, ensure business continuity, and maintain a competitive edge.
This comprehensive guide will walk you through every aspect of how to add another provider to Roocode, transforming your application's integration strategy from a collection of individual connections into a robust, adaptable, and high-performance system. We will delve into the profound benefits of a multi-provider setup, detail the preparation required, provide a step-by-step technical walkthrough, and explore advanced management techniques. By the end of this article, you will possess a clear understanding of how to leverage Roocode's capabilities to build more resilient, cost-effective, and feature-rich applications, ensuring your digital infrastructure is not only current but also future-proof.
1. Understanding Roocode and the Power of Unified APIs
Before diving into the specifics of how to add another provider to Roocode, it's essential to grasp the fundamental concepts that underpin its architecture and the significant advantages it offers. Roocode is more than just an API gateway; it’s an intelligent orchestration layer that centralizes the management, routing, and optimization of external API calls.
What is Roocode? An Orchestrator for Your Digital Ecosystem
Imagine your application needing to interact with ten different services – a payment gateway, an SMS provider, an email marketing tool, a data analytics platform, and several different Large Language Models (LLMs) for AI tasks. Traditionally, each of these would require its own API client, authentication mechanism, error handling logic, and rate limit management. This quickly becomes a spaghetti of code, challenging to maintain, scale, and debug.
Roocode solves this by presenting itself as a single point of contact for your application. When your application needs to use an external service, it makes a request to Roocode. Roocode then intelligently routes that request to one of the configured backend providers, handling all the nuances of that specific provider's API, including authentication, data transformation, and error normalization. This abstraction means your application code remains clean and focused on business logic, while Roocode manages the intricate dance of external integrations.
The platform's strength lies in its ability to abstract complex interactions, providing a standardized way to access diverse services. This capability is paramount when you consider the strategic imperative to add another provider to Roocode, as it allows for effortless expansion of your service ecosystem without re-architecting your core application.
The Unified API Concept Explained: Simplifying Complexity
The concept of a Unified API is central to Roocode's value proposition. A Unified API, sometimes referred to as a "universal API" or "integrated API," provides a single, standardized interface that connects to multiple third-party services within a specific category (e.g., multiple payment gateways, multiple CRM systems, or, in the context of AI, multiple LLM providers).
Key Principles of a Unified API:
- Standardization: It normalizes disparate APIs into a consistent data model and set of operations. For example, sending a message via Provider A or Provider B might look identical from your application's perspective, even if Provider A uses
sendMessageand Provider B usesdispatchNotification. - Abstraction: It hides the specific complexities and idiosyncrasies of each individual provider. Developers don't need to learn a new API specification for every service they integrate.
- Centralized Management: All integrations are managed from a single dashboard or configuration layer.
- Enhanced Features: Often includes advanced capabilities like load balancing, failover, caching, monitoring, and analytics that would be difficult to implement for each direct integration.
Benefits of a Unified API (as implemented by Roocode):
| Feature/Benefit | Direct Integration | Unified API (Roocode) |
|---|---|---|
| Development Time | High: Learn and implement each API individually. | Low: Integrate once with Roocode's standard API. |
| Maintenance Effort | High: Monitor changes, update clients for each API. | Low: Roocode handles provider-specific updates. |
| Scalability | Complex: Requires individual scaling for each API. | Simplified: Roocode manages routing and load balancing. |
| Resilience/Failover | Manual or custom implementation per API. | Built-in failover logic across multiple providers. |
| Vendor Lock-in | High: Switching providers means significant code changes. | Low: Providers are interchangeable behind Roocode. |
| Cost Optimization | Manual selection or fixed provider. | Dynamic routing to the most cost-effective provider. |
| Feature Access | Limited to features of a single chosen provider. | Access to diverse features across multiple providers. |
| Monitoring | Disparate logs and metrics from different services. | Centralized monitoring and analytics across all providers. |
This table clearly illustrates why adopting a Unified API platform like Roocode is a strategic decision. It shifts the burden of integration complexity from your development team to a specialized platform, freeing up resources to focus on core business innovation. When you decide to add another provider to Roocode, you are leveraging this powerful abstraction, making the process significantly smoother and more beneficial.
Why Expanding Providers Matters: More Than Just Redundancy
The decision to add another provider to Roocode goes beyond simply having a backup. It unlocks a multitude of strategic advantages:
- Business Continuity and Enhanced Resilience: This is perhaps the most immediate and tangible benefit. If your primary SMS provider experiences an outage, Roocode can automatically route messages through a secondary provider, ensuring your critical communications continue uninterrupted. This failover capability dramatically reduces the risk of service disruption and protects your reputation.
- Access to Diverse Features and Capabilities: Different providers excel in different areas. One LLM provider might offer superior image generation, while another is better for complex text summarization. By integrating multiple providers, Roocode allows you to pick the best tool for each specific task, giving your application a broader and richer set of functionalities without vendor lock-in.
- Performance Optimization: Geographic distribution, server load, and API design can cause latency variations between providers. Roocode can be configured to route requests to the fastest available provider, optimizing response times and improving user experience, especially for latency-sensitive applications.
- Cost Efficiency and Strategic Sourcing: Pricing models vary significantly between providers. Some might offer cheaper rates for high volumes, others for specific types of requests. With multiple providers integrated into Roocode, you can implement intelligent routing rules to send requests to the most cost-effective provider at any given moment, significantly reducing operational expenses.
- Avoiding Vendor Lock-in: Relying solely on one provider exposes you to their pricing changes, service limitations, and potential deprecations. By having alternatives readily available via Roocode, you maintain negotiating power and the flexibility to switch providers seamlessly, future-proofing your application against unforeseen changes.
- Geographic Compliance and Data Residency: For global applications, data residency regulations (like GDPR) can dictate where data is processed. Roocode can be configured to route requests to providers located in specific geographic regions, ensuring compliance while still benefiting from a unified interface.
In essence, deciding to add another provider to Roocode is a proactive step towards building a more robust, intelligent, and adaptable application infrastructure. It transforms potential vulnerabilities into strengths, making your services more reliable, performant, and economically viable.
2. Pre-Integration Checklist: Preparing to Add a New Provider to Roocode
Successfully integrating a new provider into Roocode requires more than just technical execution; it demands thoughtful planning and preparation. A well-executed pre-integration phase can save significant time and effort down the line, preventing common pitfalls and ensuring a smooth transition. Before you add another provider to Roocode, consider the following crucial steps.
Assessing Your Needs: Defining the "Why" and "What"
The first step is to clearly define why you need to add another provider to Roocode and what kind of provider you're looking for.
- Identify the Use Case: Are you seeking a backup for an existing service (e.g., a secondary email provider), or are you introducing an entirely new capability (e.g., a new AI model for image recognition)?
- Determine Service Category: Is it a payment gateway, an SMS service, an LLM, a data enrichment API, a CRM, or something else entirely?
- Define Core Requirements:
- Functionality: What specific operations must the new provider support? (e.g., send text, process payment, generate code).
- Performance: What are the latency requirements? What kind of throughput (requests per second) do you anticipate?
- Reliability: What uptime guarantees do you need?
- Security: What security standards and compliance certifications are critical?
- Cost: What is your budget, and what pricing model are you looking for (per-use, tiered, subscription)?
- Geographic Availability/Data Residency: Does the provider need to operate in specific regions or guarantee data residency?
A clear understanding of these needs will guide your provider selection and configuration process within Roocode.
Provider Selection Criteria: Choosing Wisely
Once you know what you need, the next step is to research and select potential providers. Evaluate candidates based on a balanced set of criteria:
- Reliability and Uptime: Look for providers with a strong track record, clear Service Level Agreements (SLAs), and robust infrastructure. Check their status pages and past incident reports.
- Features and Capabilities: Does the provider offer the exact functionalities you need, or perhaps even additional valuable features? Compare their offerings to your primary provider (if it's a backup) or to other candidates.
- Pricing Structure: Understand their pricing model (e.g., per request, per user, subscription tiers). Consider potential costs at different usage levels and factor in any hidden fees.
- Documentation Quality: Comprehensive, clear, and up-to-date API documentation is invaluable. Good documentation accelerates integration and simplifies troubleshooting.
- Developer Experience (DX): How easy is it to get started? Do they offer SDKs, client libraries, and clear examples? While Roocode abstracts much of this, understanding the underlying API is still beneficial.
- Support and Community: What kind of support do they offer (email, chat, phone, forums)? How responsive are they? A strong community can provide valuable insights and solutions.
- API Compatibility/Standardization: While Roocode handles much of the abstraction, understanding the provider's API style (REST, GraphQL, etc.) and data formats can help anticipate potential mapping challenges.
- Security and Compliance: Verify their security measures (e.g., data encryption, access controls) and ensure they comply with relevant industry standards (e.g., ISO 27001, SOC 2, HIPAA, GDPR).
Gathering Credentials: Your Key to Access
Once you've selected a provider, you'll need to sign up for their service and obtain the necessary access credentials. This is a critical step before you can add another provider to Roocode.
Common credentials include:
- API Keys: Alphanumeric strings used to authenticate your requests. These are often sent in request headers or as query parameters.
- API Secrets: Often used in conjunction with API keys for enhanced security, especially in HMAC signatures or token generation.
- Bearer Tokens/OAuth Tokens: Short-lived tokens obtained through an OAuth flow, typically used for authenticated requests.
- Endpoint URLs: The base URL(s) to which API requests should be sent (e.g.,
https://api.example.com/v1/). - Webhooks/Callback URLs: If the provider needs to send data back to your application (e.g., payment status updates), you might need to configure a webhook URL that Roocode can expose.
Security Best Practice: Treat all API keys and secrets as highly sensitive information. Never hardcode them directly into your application code. Use environment variables, secure configuration files, or a secrets management service. Roocode itself will provide secure storage for these credentials.
Understanding Roocode's Provider Architecture
Before configuring, it's helpful to have a conceptual understanding of how Roocode manages providers:
- Abstraction Layer: Roocode sits between your application and the external providers, providing a unified interface.
- Configuration Profiles: Each provider you add another provider to Roocode will have its own configuration profile within the platform. This profile includes its API endpoint, authentication details, and any specific parameters or headers it requires.
- Routing Logic: Roocode allows you to define rules for how requests are routed to providers. This can be based on criteria like load balancing, failover, cost, latency, or even specific request parameters.
- Data Transformation: In some advanced cases, Roocode might offer the ability to transform request or response data between your application's format and the provider's native format, although typically its unified API handles this at a higher level.
Reviewing Roocode Documentation: Specific Requirements
Finally, consult Roocode's official documentation for any specific requirements or best practices related to adding new providers. While this guide provides a general framework, Roocode might have unique features, configuration options, or recommended settings for different types of integrations. Pay attention to:
- Supported Provider Types: Does Roocode have specific templates or optimized integrations for certain types of services (e.g., "LLM Provider," "Payment Gateway")?
- Authentication Mechanisms: What authentication methods does Roocode support for external providers?
- Advanced Routing Options: How granular can you get with routing rules?
- Monitoring and Logging: How does Roocode integrate with external provider metrics and logs?
By meticulously completing this pre-integration checklist, you lay a solid foundation for a successful and efficient process to add another provider to Roocode, minimizing potential headaches and maximizing the benefits of your expanded integration capabilities.
3. Step-by-Step Guide: How to Add Another Provider to Roocode
Now that you've prepared, it's time to dive into the practical steps of how to add another provider to Roocode. This section will detail the process, assuming a common Roocode interface, and provide insights into various configuration options. While specific UI elements might vary slightly, the underlying logical steps remain consistent across most sophisticated Unified API platforms.
3.1 Accessing the Roocode Dashboard
Your journey begins by logging into your Roocode account.
- Open Your Web Browser: Navigate to the Roocode login page (e.g.,
https://app.roocode.com/login). - Enter Credentials: Input your username (or email) and password. If you have two-factor authentication (2FA) enabled, complete the verification step.
- Dashboard Overview: Upon successful login, you'll typically land on the Roocode dashboard. This central hub usually provides an overview of your active integrations, API usage metrics, and notifications.
3.2 Navigating to the Providers Section and Initiating Setup
To add another provider to Roocode, you need to locate the section dedicated to managing external services.
- Locate 'Providers' or 'Integrations' Menu: On the left-hand sidebar or top navigation menu, look for a link labeled "Providers," "Integrations," "External Services," or similar. Click on it.
- View Existing Providers: This page will display a list of all providers currently integrated with your Roocode account, along with their status (active, inactive), and possibly some key metrics.
- Click 'Add New Provider': Look for a prominent button, usually labeled "+ Add New Provider," "Configure New Service," or simply "Add Provider." Click this button to begin the setup wizard.
3.3 Configuring Provider Details: The Core Integration
This is where you'll input the specific information about the new service you wish to add another provider to Roocode. The wizard will guide you through several crucial configuration fields.
A. Provider Name and Identifier
- Provider Name: Enter a human-readable name for the provider (e.g., "OpenAI GPT-4," "Twilio SMS Service," "Stripe Payments"). This name will be used in the Roocode dashboard and logs for easy identification.
- Provider Identifier (Slug/Internal Name): Roocode might automatically generate a unique, machine-readable identifier based on your name (e.g.,
openai-gpt4,twilio-sms). You might have the option to customize this. This identifier is crucial for programmatic routing and referencing the provider within Roocode's API.
B. Endpoint URL
- Base URL: This is the root URL for the external provider's API. For example:
- For OpenAI:
https://api.openai.com/v1 - For Twilio:
https://api.twilio.com/2010-04-01/Accounts - For Stripe:
https://api.stripe.com/v1 - Ensure you include the correct protocol (
http://orhttps://) and any versioning in the path if specified by the provider.
- For OpenAI:
C. Authentication Method and Credentials
This is a critical step where you securely provide Roocode with the keys to access the external service. Roocode typically supports various authentication schemes.
Common Authentication Methods:
- API Key (Header/Query Parameter):
- Method: Select "API Key."
- Key Name: Enter the name of the header or query parameter the provider expects (e.g.,
Authorization,x-api-key,API_KEY). - Key Value: Paste your actual API key/token here. Roocode will securely store and use this.
- Location: Specify whether the key should be sent in the
Headeror as aQuery Parameter. - Prefix (Optional): Some providers require a prefix like
Bearer(e.g.,Authorization: Bearer YOUR_API_KEY). If so, enter it here.
- Bearer Token (OAuth/JWT):
- Method: Select "Bearer Token."
- Token: Paste the Bearer Token directly. This is often used for services that issue JSON Web Tokens (JWTs) or OAuth access tokens. Roocode will automatically add the
Authorization: Bearerprefix.
- Basic Authentication (Username/Password):
- Method: Select "Basic Auth."
- Username: Enter the username provided by the external service.
- Password: Enter the password. Roocode will base64 encode these and send them in the
Authorization: Basicheader.
- Custom/Advanced Authentication:
- Some providers might require more complex authentication (e.g., HMAC signatures, mutual TLS). Roocode may offer a "Custom" or "Advanced" option where you can specify custom headers or even provide a script for dynamic token generation. Consult Roocode's documentation for these specific cases.
Example for OpenAI (API Key in Header):
- Authentication Method: API Key
- Key Name:
Authorization - Key Value:
sk-xxxxxxxxxxxxxxxxxxxxxxxxxxxxxxxxxxxxxxxx(your actual OpenAI key) - Location: Header
- Prefix:
Bearer(with a space)
D. Custom Headers and Parameters (Optional)
Some APIs require specific headers or fixed query parameters for every request.
- Headers: Add key-value pairs for any additional headers.
- Example:
Content-Type: application/json(often automatically handled but good to know),x-my-custom-id: your-app-identifier.
- Example:
- Query Parameters: Add key-value pairs for any default query parameters.
- Example:
version: 2.0,format: json.
- Example:
E. Rate Limiting and Concurrency Settings
To prevent overwhelming the external provider (and getting your API key blocked) or manage your own usage, Roocode allows you to configure rate limits.
- Max Requests Per Second (RPS): Set a maximum number of requests that Roocode will send to this provider within a second. Consult the provider's documentation for their official rate limits.
- Max Concurrent Requests: Define how many simultaneous requests Roocode can have outstanding to this provider.
- Burst Limit: Allows for temporary spikes above the average rate limit.
Configuring these settings correctly is crucial for respectful API usage and stable application performance.
F. Timeout Settings
- Connection Timeout: How long Roocode should wait to establish a connection to the provider's server.
- Response Timeout: How long Roocode should wait for the provider to send a full response after the connection is established.
- These are usually specified in milliseconds or seconds. Setting appropriate timeouts prevents your application from hanging indefinitely if a provider becomes unresponsive.
Table: Key Configuration Parameters for Adding a Provider
| Parameter | Description | Example Value |
|---|---|---|
| Provider Name | Human-readable name for the service. | Stripe Payments Gateway |
| Provider Identifier | Unique internal identifier for the provider. | stripe-prod-gateway |
| Base Endpoint URL | The root URL for the provider's API. | https://api.stripe.com/v1 |
| Authentication Method | How Roocode authenticates with the provider. | API Key (Header) |
| API Key Name | The name of the header or query parameter for the API key. | Authorization |
| API Key Value | The actual API key/token (securely stored). | sk_live_XXXXXXXXXXXXXXXXXXXX |
| API Key Prefix | Optional prefix for the API key (e.g., Bearer). |
Bearer |
| Max RPS (Rate Limit) | Maximum requests per second Roocode sends to this provider. | 50 (requests/second) |
| Max Concurrent Requests | Maximum simultaneous requests to this provider. | 20 |
| Connection Timeout | Time (in ms) to establish connection. | 5000 (ms) |
| Response Timeout | Time (in ms) to receive full response. | 15000 (ms) |
| Custom Headers | Additional HTTP headers required by the provider. | X-Client-ID: myapp-v1 |
| Default Query Params | Query parameters always appended to requests. | version=2023-10-16 |
3.4 Testing the Connection
After configuring the provider, it's crucial to test the connection to ensure everything is set up correctly before deploying it for live traffic.
- Locate 'Test Connection' Button: On the configuration screen, usually at the bottom, there will be a "Test Connection" or "Verify Provider" button.
- Execute Test: Clicking this button will prompt Roocode to send a simple, often predefined, request to the external provider using the credentials and settings you've provided.
- Review Test Results:
- Success: A green checkmark or "Connection Successful" message indicates that Roocode could connect, authenticate, and receive a valid response from the provider.
- Failure: A red error message will indicate a problem. Common issues include:
- Invalid API Key/Credentials: Double-check your API key, secret, username, and password for typos or incorrect values.
- Incorrect Endpoint URL: Verify the base URL for any misspellings or missing path segments.
- Rate Limit Exceeded: If you're using a free tier or have hit the provider's limit during testing.
- Firewall/Network Issues: Less common with cloud-based platforms like Roocode, but ensures Roocode's IPs are whitelisted if the provider has restrictions.
- Missing Headers/Parameters: The provider might require specific headers (e.g.,
Content-Type) even for simple tests.
- Debugging Tips: If the test fails, carefully read the error message provided by Roocode. It will often contain clues from the external API about what went wrong (e.g., "Invalid authentication credentials," "Resource not found"). Go back to the configuration steps and make necessary adjustments.
3.5 Saving and Activating the Provider
Once the connection test is successful, you can save and activate your new provider.
- Click 'Save' or 'Create Provider': Finalize your configuration by clicking the save button.
- Activate Provider: Roocode might have a separate toggle or step to "Activate" the provider. This makes it available for use by your applications through Roocode's Unified API. Until activated, it's merely a saved configuration.
- Confirm Activation: Check the 'Providers' list in your Roocode dashboard. The newly added provider should now appear with an "Active" status.
3.6 Advanced Configuration: Maximizing Resilience and Performance
To truly leverage the power of Roocode, especially after you add another provider to Roocode, you should explore its advanced configuration options. These settings dictate how Roocode intelligently routes and manages requests across multiple providers.
A. Load Balancing Strategies
Load balancing distributes incoming API requests across multiple instances of a service, or in Roocode's case, across multiple external providers that offer similar functionality.
- Round Robin: Requests are distributed sequentially to each active provider in turn (Provider A, then B, then C, then A again). Simple and effective for evenly distributed load.
- Least Latency/Response Time: Roocode monitors the response times of all providers and routes new requests to the one currently responding the fastest. Ideal for performance-critical applications.
- Weighted Round Robin: Assigns a "weight" to each provider, indicating how many requests it should receive relative to others. Useful if some providers are more powerful or have higher rate limits.
- Cost-Based Routing: Routes requests to the provider that offers the lowest cost for a specific type of request at that moment. Requires Roocode to have knowledge of provider pricing models.
- Region-Specific Routing: Routes requests to a provider whose data center is geographically closest to the origin of the request or meets specific data residency requirements.
B. Failover Policies
Failover ensures continuity of service if a primary provider becomes unavailable.
- Primary/Secondary: Designate one provider as primary and others as secondaries. Roocode will only use secondary providers if the primary fails.
- Automatic Retries: Configure how many times Roocode should retry a failed request with the same provider, or with a different one, before declaring the request failed.
- Circuit Breaker Pattern: Roocode can implement a circuit breaker that "trips" (opens) if a provider consistently fails, preventing further requests from being sent to it for a defined period, allowing it to recover.
- Health Checks: Configure Roocode to periodically check the "health" (availability and responsiveness) of each provider. If a provider fails a health check, it can be temporarily removed from the routing pool.
C. Health Checks
- Endpoint: Specify a health check endpoint (e.g.,
/healthor/status) on the external provider that Roocode can ping. - Interval: How frequently Roocode should perform health checks (e.g., every 30 seconds).
- Thresholds: Define what constitutes a "healthy" response (e.g., HTTP 200 OK, specific response body content).
- Consecutive Failures: How many consecutive failures mark a provider as unhealthy.
D. Priority Settings
For scenarios where you have multiple providers for the same service, you can assign priorities. For instance, a free tier LLM might be priority 3, a paid standard tier priority 2, and a premium enterprise tier priority 1. Roocode can attempt to use higher-priority providers first, only falling back to lower ones if necessary or if a cost-based routing rule dictates.
By thoughtfully configuring these advanced settings after you add another provider to Roocode, you transform a simple integration into a highly resilient, performant, and cost-effective component of your application's architecture.
XRoute is a cutting-edge unified API platform designed to streamline access to large language models (LLMs) for developers, businesses, and AI enthusiasts. By providing a single, OpenAI-compatible endpoint, XRoute.AI simplifies the integration of over 60 AI models from more than 20 active providers(including OpenAI, Anthropic, Mistral, Llama2, Google Gemini, and more), enabling seamless development of AI-driven applications, chatbots, and automated workflows.
4. Managing Your New Provider within Roocode
Adding a provider is only the first step. Effective management ensures that your integrated services continue to perform optimally, remain secure, and align with your operational needs. Roocode provides a suite of tools for monitoring, updating, and troubleshooting your integrated providers.
Monitoring Provider Performance: Staying Informed
Once you add another provider to Roocode and activate it, continuous monitoring becomes critical. Roocode's dashboard typically offers a centralized view of your API traffic and provider health.
- Latency Metrics: Track the average and percentile latency for requests sent to each provider. High latency could indicate issues with the provider itself or network bottlenecks.
- Error Rates: Monitor the percentage of requests resulting in errors (e.g., HTTP 4xx, 5xx). Spikes in error rates are often the first sign of a problem.
- Usage Volume: Keep an eye on the number of requests routed to each provider. This helps in understanding usage patterns and forecasting costs.
- Uptime Status: Roocode’s health checks will update the real-time availability status of each provider, giving you an immediate overview of which services are operational.
- Alerts and Notifications: Configure alerts within Roocode to be notified via email, Slack, or other channels if a provider's latency increases, error rates spike, or it becomes unresponsive. Proactive alerting is key to rapid response.
Regularly reviewing these metrics helps you assess if the new provider is meeting expectations and identify potential issues before they impact your end-users.
Updating Provider Settings: Adapting to Change
Service providers often update their APIs, change their rate limits, or require new authentication methods. Being able to easily modify configurations within Roocode is essential.
- Navigate to Provider List: Go back to the 'Providers' section in your Roocode dashboard.
- Select Provider: Click on the name or identifier of the provider you wish to update.
- Edit Configuration: You'll be taken to the provider's detailed configuration page. Here, you can modify any of the settings you initially configured:
- Update API Keys: If a key is revoked or expires, you can replace it securely.
- Adjust Endpoints: If a provider changes its base URL or version.
- Modify Rate Limits: To align with new agreements or observed provider behavior.
- Refine Routing Rules: Adjust load balancing weights, failover thresholds, or priority settings based on performance data or cost changes.
- Save Changes: Always remember to save your changes after making any modifications. Roocode usually applies these updates immediately or after a short propagation delay.
Deactivating/Removing Providers: Managing Your Ecosystem
Sometimes, a provider may no longer be needed, or you might decide to replace it with a better alternative. Roocode makes it easy to manage the lifecycle of your integrations.
- Deactivating: If you want to temporarily stop sending traffic to a provider without deleting its configuration, you can deactivate it. This is useful for maintenance, testing, or temporary outages on the provider's side. Deactivated providers can be reactivated later.
- Removing: If a provider is permanently decommissioned or no longer required, you can remove it entirely. This deletes its configuration and credentials from Roocode.
- Caution: Before removing, ensure no critical parts of your application still depend on that provider, even indirectly through Roocode's routing logic. Review usage logs to confirm it's no longer receiving traffic.
Troubleshooting Common Issues
Even with careful planning, issues can arise. Knowing how to troubleshoot them within the Roocode environment is crucial.
- "Invalid Authentication Credentials":
- Check: Verify API keys, secrets, usernames, and passwords. Ensure there are no leading/trailing spaces or incorrect characters.
- Action: Re-enter credentials in Roocode. Regenerate keys on the provider's dashboard if necessary.
- Consider: Is the key type correct (e.g., production vs. sandbox key)? Is the prefix correct (e.g.,
Bearer)?
- "Rate Limit Exceeded":
- Check: Compare Roocode's configured rate limits with the provider's actual limits. Review Roocode's usage graphs.
- Action: Increase Roocode's internal rate limits if the provider allows more. Implement more aggressive load balancing or failover to other providers. Consider a higher tier with the provider.
- "Connection Timed Out" / "Provider Unavailable":
- Check: Verify the provider's base endpoint URL. Check the provider's official status page for known outages. Review Roocode's health check logs.
- Action: If the provider is down, rely on Roocode's failover to a secondary provider. If it's an intermittent issue, adjust Roocode's timeout settings or health check sensitivity.
- "Bad Request" (HTTP 400) / "Data Format Error":
- Check: While Roocode's Unified API abstracts much, ensure your application is sending data in a format Roocode expects, and Roocode is correctly forwarding or transforming it. Sometimes, providers have very specific JSON schemas or header requirements for specific endpoints.
- Action: Review Roocode's logs for the exact request sent to the provider and the provider's error response. Cross-reference with the provider's API documentation.
Roocode's comprehensive logging and monitoring tools are your best friends in troubleshooting. Utilize them to trace requests, analyze responses, and pinpoint the exact source of an issue, whether it's within your application, Roocode, or the external provider.
Best Practices for Multi-Provider Management
To maximize the benefits of having multiple providers integrated via Roocode:
- Consistent Naming Conventions: Use clear and consistent names for your providers in Roocode (e.g.,
SMS-Twilio-Primary,SMS-MessageBird-Backup). - Regular Credential Rotation: Periodically rotate your API keys and secrets for enhanced security, especially for critical providers.
- Performance Benchmarking: Periodically benchmark the performance of different providers under varying loads to optimize routing strategies.
- Cost Tracking: Integrate Roocode's usage data with your cost management tools to keep track of spending across providers and optimize for cost-effectiveness.
- Documentation: Maintain internal documentation detailing which providers are used for what purpose, their configurations in Roocode, and any specific considerations.
- Controlled Rollouts: When
add another provider to Roocodeor making significant changes, roll out gradually (e.g., start with 5% of traffic) to observe behavior before full deployment.
By adopting these practices, you can ensure that your multi-provider Roocode setup remains efficient, secure, and aligned with your evolving business needs.
5. Real-World Scenarios and Benefits of a Multi-Provider Roocode Setup
The theoretical advantages of having a Unified API platform and the ability to add another provider to Roocode truly shine in practical, real-world applications. By abstracting integrations and intelligently routing requests, Roocode enables capabilities that are difficult, if not impossible, to achieve with direct, single-provider integrations.
Enhanced Resiliency and Uptime: Avoiding Single Points of Failure
Consider a mission-critical e-commerce application that relies on an SMS service to send two-factor authentication (2FA) codes. If the primary SMS provider goes down, users cannot log in, transactions halt, and the business suffers immediate revenue loss and reputational damage.
Roocode Solution: By configuring two or more SMS providers within Roocode, with a robust failover policy (e.g., primary/secondary with automatic retries and health checks), the application's reliance on a single vendor is eliminated. If Provider A fails, Roocode automatically reroutes 2FA message requests to Provider B, ensuring uninterrupted service. The end-user never even knows an outage occurred. This dramatically improves the application's overall uptime and reliability.
Optimized Performance: Routing to the Fastest Link
For global applications, latency can significantly impact user experience. An AI-powered chatbot might need to access an LLM quickly to maintain a natural conversation flow.
Roocode Solution: Integrate multiple LLM providers (e.g., OpenAI, Anthropic, Google Gemini) into Roocode. Using a "Least Latency" load balancing strategy, Roocode constantly monitors the response times from each provider. When a chatbot request comes in, Roocode intelligently routes it to the LLM provider that is currently responding the fastest for that geographic region or API endpoint. This ensures that users, regardless of their location, experience the quickest possible AI response, leading to a smoother and more engaging interaction.
Cost Efficiency: Leveraging Price Differences
Different API providers often have varying pricing structures, especially for similar services like data processing or AI model inference. One provider might be cheaper for high-volume text generation, while another offers a better rate for image analysis.
Roocode Solution: After you add another provider to Roocode for similar functionalities, you can implement cost-based routing. Roocode, if configured with provider pricing information, can dynamically choose the provider that offers the most cost-effective solution for each incoming request. For example, if Provider X charges less for smaller text summaries and Provider Y is cheaper for larger content generation, Roocode can route requests accordingly, optimizing your operational expenses without any changes to your application's code. This dynamic optimization can lead to significant cost savings over time, especially for high-volume applications.
Access to Niche Capabilities: Integrating Specialized Services
The world of AI, in particular, is witnessing an explosion of specialized models. One provider might offer a cutting-edge model for medical image analysis, while another specializes in legal document summarization. Your application might need access to several such niche capabilities.
Roocode Solution: Instead of building custom integrations for each specialized AI model, you can add another provider to Roocode for each specific niche. Your application simply calls Roocode's Unified API with a request for "medical image analysis," and Roocode routes it to the appropriate specialized provider. This approach allows your application to access a broad spectrum of specialized AI capabilities through a single, consistent interface, vastly expanding its potential without adding integration overhead. It also means if a new, better model emerges, you can swap it in Roocode without touching your application.
Future-Proofing Your Applications: Agility in a Changing Landscape
The digital landscape is constantly shifting. Providers can change their APIs, deprecate features, or even go out of business. Being tied to a single vendor can make your application vulnerable to these changes.
Roocode Solution: By design, Roocode helps future-proof your applications. If your primary LLM provider decides to significantly increase its prices or change its API in a breaking way, you can simply add another provider to Roocode (a new LLM), configure it, and seamlessly shift traffic. Your application continues to interact with Roocode's Unified API, completely unaware of the backend provider switch. This agility provides immense business value, allowing you to quickly adapt to market changes, negotiate better deals, and avoid costly re-engineering efforts. It ensures your application remains robust and adaptable, regardless of the turbulent external service environment.
These real-world examples underscore that add another provider to Roocode is not merely a technical exercise but a strategic imperative. It empowers organizations to build more resilient, intelligent, and economically sound applications capable of thriving in today's complex digital ecosystem.
6. The Future of API Integration and the Role of Platforms like Roocode and XRoute.AI
The proliferation of APIs has been a defining characteristic of modern software development, but it has also brought an unprecedented level of complexity. Developers are now faced with managing a myriad of endpoints, authentication schemes, rate limits, and data formats, often for services that perform fundamentally similar functions. This fragmentation not only slows down development but also introduces fragility and high maintenance costs into applications.
The growing demand for Unified API platforms is a direct response to this challenge. These platforms represent the next evolutionary step in API integration, moving beyond simple API gateways to offer intelligent orchestration, standardization, and optimization. They are becoming indispensable tools for businesses and developers who seek to harness the full power of external services without getting bogged down in the minutiae of individual API integrations. As more services become API-driven, and as specialized AI models continue to emerge, the role of a robust Unified API platform like Roocode will only grow in importance.
In this dynamic environment, platforms that offer a seamless and efficient way to interact with a broad spectrum of AI models are particularly valuable. One such cutting-edge platform leading the charge in the realm of Large Language Model (LLM) integration is XRoute.AI.
XRoute.AI: A Leading Unified API for LLMs
XRoute.AI is a cutting-edge unified API platform designed to streamline access to large language models (LLMs) for developers, businesses, and AI enthusiasts. Recognizing the challenges of integrating multiple, constantly evolving LLMs, XRoute.AI provides a single, OpenAI-compatible endpoint. This innovative approach simplifies the integration of over 60 AI models from more than 20 active providers, enabling seamless development of AI-driven applications, chatbots, and automated workflows.
Much like how Roocode aims to simplify general API integrations, XRoute.AI focuses specifically on the burgeoning LLM ecosystem. It addresses critical needs for developers by providing:
- Low Latency AI: XRoute.AI intelligently routes requests to the fastest available LLM provider, ensuring minimal delays for real-time applications.
- Cost-Effective AI: By enabling dynamic routing based on pricing, XRoute.AI helps users leverage the most economical LLM for each specific task, optimizing operational costs.
- Developer-Friendly Tools: With its single, OpenAI-compatible endpoint, developers can switch between powerful LLMs (e.g., GPT-4, Claude, Gemini, Llama) with minimal code changes, drastically reducing development overhead.
- High Throughput and Scalability: The platform is built to handle high volumes of requests, making it suitable for enterprise-level applications and ensuring your AI services can scale with demand.
The focus on low latency AI and cost-effective AI highlights the pragmatic benefits that specialized Unified API solutions bring to the table, especially in computationally intensive domains like AI. By leveraging platforms like XRoute.AI for LLMs, or Roocode for broader API orchestration, developers are empowered to build intelligent solutions without the complexity of managing multiple API connections. They can focus on innovation, knowing that the underlying integration challenges are expertly handled by these robust platforms.
The future of API integration is clearly moving towards greater abstraction, intelligence, and unified access. As applications become more complex and rely on an ever-growing array of external services, platforms that offer elegant solutions for managing this complexity will become indispensable. Whether it's integrating a new payment gateway or incorporating the latest AI model, the ability to add another provider to Roocode or leverage specialized Unified API platforms like XRoute.AI is not just a convenience—it's a necessity for building resilient, adaptable, and high-performing digital products in the modern era.
Conclusion
In an interconnected digital world, the ability to effectively manage and leverage a diverse ecosystem of external services is no longer a luxury but a fundamental requirement for innovation and resilience. Platforms like Roocode stand at the forefront of this evolution, offering a robust Unified API solution that transforms integration challenges into strategic advantages.
Throughout this comprehensive guide, we've explored the profound benefits of consolidating your API interactions through Roocode, from enhanced business continuity and optimized performance to significant cost efficiencies and unparalleled agility. We've walked through the meticulous steps of how to add another provider to Roocode, emphasizing the importance of thorough preparation, precise configuration, and diligent ongoing management. From initial needs assessment and provider selection to configuring advanced routing and failover policies, each step contributes to building a more resilient and adaptable application infrastructure.
The decision to add another provider to Roocode is a powerful one, enabling your applications to tap into a wider range of capabilities, mitigate risks associated with vendor lock-in, and dynamically optimize for factors like cost and latency. By centralizing the management of your external services, Roocode empowers your development teams to focus on core product innovation, rather than grappling with the complexities of disparate API integrations.
As the landscape of external services, especially in the realm of AI with specialized platforms like XRoute.AI leading the charge for LLM integration, continues to expand and evolve, the strategic value of a platform like Roocode will only intensify. Embrace the power of Unified API management, expand your application's horizons, and ensure your digital solutions are not just current, but truly future-proof.
Frequently Asked Questions (FAQ)
Q1: Why should I add another provider to Roocode if my current one works fine?
A1: While your current provider may be working well, adding another provides several critical benefits. Primarily, it enhances resilience through failover, ensuring your application remains operational even if your primary provider experiences an outage. It also allows for performance optimization (routing to the fastest provider), cost efficiency (dynamic routing to the cheapest provider), and access to diverse features that a single provider might not offer. This multi-provider strategy future-proofs your application and reduces vendor lock-in.
Q2: What kind of providers can I integrate with Roocode?
A2: Roocode, as a Unified API platform, is designed to integrate with a wide range of external service providers that offer an API. This can include, but is not limited to, Large Language Models (LLMs), payment gateways (Stripe, PayPal), SMS and email services (Twilio, SendGrid), data enrichment platforms, CRM systems, cloud storage solutions, and various other SaaS APIs. If a service offers a programmable interface, Roocode can typically abstract and manage its integration.
Q3: Is it difficult to switch between providers once they are added?
A3: No, one of the primary advantages of using Roocode is that it makes switching between providers seamless from your application's perspective. Your application always interacts with Roocode's Unified API, regardless of which backend provider is being used. Within Roocode's dashboard, you can easily configure routing rules, set priorities, or enable/disable providers, and Roocode handles the underlying traffic redirection without requiring any code changes in your application.
Q4: How does Roocode handle authentication for multiple providers?
A4: Roocode securely stores the API keys, tokens, or credentials for each provider you add. When your application makes a request to Roocode, Roocode then uses the appropriate, securely stored credentials to authenticate with the chosen backend provider. This means your application doesn't need to manage individual provider credentials; it only needs to authenticate with Roocode, which then acts as a secure intermediary for all external API calls.
Q5: Can Roocode help me save money by using multiple providers?
A5: Absolutely. By integrating multiple providers offering similar services, Roocode enables cost-based routing. You can configure Roocode to dynamically analyze provider pricing (if this data is available or can be configured) and route requests to the most cost-effective provider at any given moment. This can lead to significant savings, especially for applications with high API call volumes, as you can take advantage of fluctuating prices or different pricing tiers across various vendors without any manual intervention.
🚀You can securely and efficiently connect to thousands of data sources with XRoute in just two steps:
Step 1: Create Your API Key
To start using XRoute.AI, the first step is to create an account and generate your XRoute API KEY. This key unlocks access to the platform’s unified API interface, allowing you to connect to a vast ecosystem of large language models with minimal setup.
Here’s how to do it: 1. Visit https://xroute.ai/ and sign up for a free account. 2. Upon registration, explore the platform. 3. Navigate to the user dashboard and generate your XRoute API KEY.
This process takes less than a minute, and your API key will serve as the gateway to XRoute.AI’s robust developer tools, enabling seamless integration with LLM APIs for your projects.
Step 2: Select a Model and Make API Calls
Once you have your XRoute API KEY, you can select from over 60 large language models available on XRoute.AI and start making API calls. The platform’s OpenAI-compatible endpoint ensures that you can easily integrate models into your applications using just a few lines of code.
Here’s a sample configuration to call an LLM:
curl --location 'https://api.xroute.ai/openai/v1/chat/completions' \
--header 'Authorization: Bearer $apikey' \
--header 'Content-Type: application/json' \
--data '{
    "model": "gpt-5",
    "messages": [
        {
            "content": "Your text prompt here",
            "role": "user"
        }
    ]
}'
With this setup, your application can instantly connect to XRoute.AI’s unified API platform, leveraging low latency AI and high throughput (handling 891.82K tokens per month globally). XRoute.AI manages provider routing, load balancing, and failover, ensuring reliable performance for real-time applications like chatbots, data analysis tools, or automated workflows. You can also purchase additional API credits to scale your usage as needed, making it a cost-effective AI solution for projects of all sizes.
Note: Explore the documentation on https://xroute.ai/ for model-specific details, SDKs, and open-source examples to accelerate your development.