OpenClaw Docker Compose: Streamlined Setup Guide

XRoute is a cutting-edge unified API platform designed to streamline access to large language models (LLMs) for developers, businesses, and AI enthusiasts. By providing a single, OpenAI-compatible endpoint, XRoute.AI simplifies the integration of over 60 AI models from more than 20 active providers(including OpenAI, Anthropic, Mistral, Llama2, Google Gemini, and more), enabling seamless development of AI-driven applications, chatbots, and automated workflows.
Unlocking Efficiency: A Comprehensive Guide to OpenClaw Deployment with Docker Compose
In the rapidly evolving landscape of software development and system management, the ability to deploy complex applications with speed, consistency, and reliability is paramount. Traditional deployment methods often grapple with dependency conflicts, environment inconsistencies, and arduous setup processes, leading to significant time and resource drain. Enter Docker and Docker Compose – revolutionary tools that transform how applications are built, shipped, and run. This comprehensive guide delves into the streamlined setup of OpenClaw using Docker Compose, offering a robust, reproducible, and efficient deployment strategy that sidesteps common pitfalls and paves the way for optimized performance and cost optimization.
OpenClaw, a powerful, albeit hypothetical, application designed to perform complex data analysis, real-time monitoring, and potentially interact with advanced machine learning models or api ai services, stands to gain immensely from containerization. By encapsulating OpenClaw and its myriad dependencies within isolated Docker containers, we achieve environmental parity across development, testing, and production environments. Docker Compose further elevates this by orchestrating multi-container OpenClaw applications, defining their services, networks, and volumes in a single, declarative YAML file. This approach not only simplifies the initial setup but also significantly enhances the manageability, scalability, and maintainability of your OpenClaw ecosystem.
This guide is meticulously crafted for developers, system administrators, and technology enthusiasts who seek to harness the full potential of containerized deployments. We will navigate through the core concepts, provide a step-by-step setup walkthrough, explore advanced configurations, discuss performance optimization strategies, and integrate insights on how such a streamlined setup contributes to overall operational efficiency and resource management. Our aim is to demystify the process, offering rich detail and practical advice that transforms a potentially daunting deployment into a smooth, repeatable, and highly effective operation.
Introduction to OpenClaw, Docker, and Docker Compose
Before we embark on the practical journey of deploying OpenClaw, it's essential to lay a solid foundation by understanding the protagonists of our story: OpenClaw itself, Docker, and Docker Compose.
What is OpenClaw? (A Conceptual Overview)
For the purpose of this guide, let's conceptualize OpenClaw as a sophisticated, modular application framework designed to tackle challenging computational tasks. Imagine OpenClaw comprising several interdependent services: * A data ingestion service (e.g., openclaw-ingest) that collects information from various sources. * A processing engine (e.g., openclaw-processor) responsible for transforming and analyzing data. * A database service (e.g., openclaw-db) for persistent storage of processed results. * A web-based user interface (e.g., openclaw-ui) for visualization and interaction. * Potentially, an AI inference service (e.g., openclaw-ai) that leverages machine learning models or interacts with external api ai endpoints for advanced analytics or predictive capabilities.
The inherent complexity of such an application, with its diverse technological stacks and inter-service communications, makes it a perfect candidate for containerization. Without Docker, managing the specific versions of Python, Java, Node.js, database drivers, and other libraries required by each OpenClaw component would be a labyrinthine task, prone to "it works on my machine" syndrome.
The Revolution of Docker: Containers Explained
Docker revolutionized application deployment by introducing the concept of containers. A Docker container is a lightweight, standalone, executable package of software that includes everything needed to run an application: code, runtime, system tools, system libraries, and settings. * Isolation: Each container runs in isolation from other containers and the host system. This eliminates dependency conflicts. * Portability: A containerized application runs consistently across any environment that has Docker installed, from a developer's laptop to a production server or cloud instance. * Efficiency: Containers share the host OS kernel, making them much lighter and faster to start than traditional virtual machines. * Version Control: Docker images (the blueprint for containers) can be versioned, allowing for easy rollbacks and consistent deployments.
Docker Compose: Orchestrating Multi-Container Applications
While Docker excels at running single containers, most real-world applications, like our conceptual OpenClaw, are composed of multiple services that need to communicate and work together. This is where Docker Compose shines. Docker Compose is a tool for defining and running multi-container Docker applications. With Compose, you use a YAML file to configure your application's services. Then, with a single command (docker-compose up), you create and start all the services from your configuration. Key benefits of Docker Compose include: * Declarative Configuration: Define your entire application stack in a single, human-readable docker-compose.yml file. * Simplified Management: Start, stop, rebuild, and scale all services of your application with simple commands. * Network Automation: Compose automatically creates a default network for your application, allowing services to discover and communicate with each other using their service names. * Volume Management: Easily define and manage persistent storage for your services, ensuring data is not lost when containers are restarted or removed.
By leveraging Docker Compose, we transform the intricate setup of OpenClaw into a well-defined, easily repeatable, and highly manageable process. This foundational understanding is crucial as we move into the practical aspects of setting up OpenClaw.
Prerequisites and System Setup for OpenClaw Docker Compose
Before we can begin orchestrating OpenClaw with Docker Compose, certain prerequisites must be met on your host system. This section details the necessary software installations and crucial system considerations to ensure a smooth deployment.
Hardware Requirements
While Docker containers are lightweight, the overall resources required will depend heavily on the scale and workload of your OpenClaw deployment, especially if it involves intensive data processing, real-time analytics, or significant api ai interactions.
| Component | Minimum Recommended | Production/Intensive Workloads | Considerations |
|---|---|---|---|
| CPU Cores | 2 cores | 4-8+ cores | Processing intensity of openclaw-processor and openclaw-ai services. |
| RAM | 4 GB | 8-32+ GB | Database caching, in-memory processing, UI responsiveness. |
| Disk Space | 20 GB (SSD) | 100-500+ GB (NVMe SSD) | Docker images, container logs, persistent data for openclaw-db. SSDs are crucial for performance optimization. |
| Network I/O | 1 Gbps NIC | 10 Gbps NIC | Especially important for high-volume data ingestion or frequent api ai calls. |
For initial development and testing, a machine with 4 cores and 8GB RAM is generally sufficient. For production environments, especially those demanding high throughput or complex AI operations, scaling up these resources is a direct path to performance optimization.
Software Installation
You'll need Docker Engine and Docker Compose installed on your host system.
- Install Docker Engine: Docker offers official installation guides for various operating systems. It's crucial to follow the instructions specific to your OS to ensure correct installation.
- Linux (Ubuntu/Debian example):
bash # Update your existing list of packages sudo apt update # Install a few prerequisite packages sudo apt install ca-certificates curl gnupg lsb-release # Add Docker's official GPG key sudo mkdir -p /etc/apt/keyrings curl -fsSL https://download.docker.com/linux/ubuntu/gpg | sudo gpg --dearmor -o /etc/apt/keyrings/docker.gpg # Set up the repository echo \ "deb [arch=$(dpkg --print-architecture) signed-by=/etc/apt/keyrings/docker.gpg] https://download.docker.com/linux/ubuntu \ $(lsb_release -cs) stable" | sudo tee /etc/apt/sources.list.d/docker.list > /dev/null # Install Docker Engine, containerd, and Docker Compose (if not installing separately) sudo apt update sudo apt install docker-ce docker-ce-cli containerd.io docker-buildx-plugin docker-compose-pluginRemember to add your user to thedockergroup to run Docker commands withoutsudo:bash sudo usermod -aG docker $USER newgrp dockerYou might need to log out and log back in for the changes to take effect. - macOS and Windows: Docker Desktop is the recommended way to install Docker Engine and Docker Compose on these platforms. Download it from the official Docker website and follow the installation wizard. Docker Desktop bundles Docker Engine, Docker CLI client, Docker Compose, Kubernetes, and more.
- Linux (Ubuntu/Debian example):
Verify Installation: After installation, open a terminal or command prompt and run the following commands to ensure Docker and Docker Compose are correctly installed:```bash docker --version docker compose version # Note the space for newer Docker Compose CLI plugin
or for older standalone Compose
docker-compose --version
``` You should see version numbers for both, confirming a successful installation.
Understanding User Permissions
Proper user permissions are vital for security and smooth operation. Ensure that the user running Docker Compose commands has appropriate permissions to interact with the Docker daemon. On Linux, this typically involves adding the user to the docker group, as mentioned above. Failing to do so will result in permission errors, requiring sudo for every Docker command, which is less convenient and potentially less secure for regular operations.
Crafting Your docker-compose.yml: The Blueprint for OpenClaw
The docker-compose.yml file is the heart of your OpenClaw deployment. It's a declarative configuration that defines all the services, networks, and volumes that constitute your application. Understanding its structure and various sections is crucial for effective orchestration.
Let's construct a sample docker-compose.yml for our conceptual OpenClaw application, gradually adding complexity and explaining each component.
version: '3.8' # Specify the Docker Compose file format version

services:
  # 1. OpenClaw Database Service (PostgreSQL example)
  openclaw-db:
    image: postgres:13-alpine # Using a lightweight PostgreSQL image
    environment:
      POSTGRES_DB: openclaw_data
      POSTGRES_USER: openclaw_user
      POSTGRES_PASSWORD: ${DB_PASSWORD} # Best practice: use environment variables
    volumes:
      - db_data:/var/lib/postgresql/data # Persistent data storage
    ports:
      - "5432:5432" # Expose database port to host (optional, for direct access)
    restart: always # Automatically restart if container stops
    healthcheck: # Ensure the database is ready before other services connect
      test: ["CMD-SHELL", "pg_isready -U openclaw_user -d openclaw_data"]
      interval: 10s
      timeout: 5s
      retries: 5

  # 2. OpenClaw Processor Service (e.g., Python application)
  openclaw-processor:
    build:
      context: ./processor # Path to Dockerfile for this service
      dockerfile: Dockerfile
    environment:
      DATABASE_URL: postgresql://openclaw_user:${DB_PASSWORD}@openclaw-db:5432/openclaw_data
      PROCESSOR_THREADS: 4
      AI_API_ENDPOINT: ${AI_API_ENDPOINT} # If interacting with external AI
      AI_API_KEY: ${AI_API_KEY} # Securely inject API keys
    depends_on:
      openclaw-db:
        condition: service_healthy # Ensure DB is ready before starting processor
    restart: on-failure
    ports:
      - "8000:8000" # If the processor exposes an API
    volumes:
      - ./logs/processor:/app/logs # Map logs to host for easy access

  # 3. OpenClaw Ingestion Service (e.g., Node.js application)
  openclaw-ingest:
    build:
      context: ./ingest
      dockerfile: Dockerfile
    environment:
      PROCESSOR_SERVICE_URL: http://openclaw-processor:8000/ingest
      INGESTION_RATE_LIMIT: 100/second
    depends_on:
      - openclaw-processor # Simple dependency
    restart: on-failure
    ports:
      - "3000:3000" # For incoming data streams
    volumes:
      - ./config/ingest:/app/config:ro # Read-only config mapping

  # 4. OpenClaw UI Service (e.g., Nginx serving a React app)
  openclaw-ui:
    build:
      context: ./ui
      dockerfile: Dockerfile
    environment:
      # UI might interact with processor or ingest services directly or via a gateway
      API_BASE_URL: http://localhost:3000 # Example: if UI talks to ingest directly (or via proxy)
    ports:
      - "80:80" # Expose UI on standard HTTP port
      - "443:443" # For HTTPS (requires further configuration)
    restart: always
    depends_on:
      - openclaw-ingest # UI might display data processed by these services

  # 5. OpenClaw AI Inference Service (if not using external API)
  openclaw-ai:
    build:
      context: ./ai_service
      dockerfile: Dockerfile
    environment:
      MODEL_PATH: /app/models/my_model.pt
      GPU_ENABLED: "false" # Set to "true" if host has NVIDIA GPU and Docker configured
    deploy: # Deployment specific configurations for scaling/resources
      resources:
        limits:
          cpus: '2.0'
          memory: 4096M
        reservations:
          cpus: '1.0'
          memory: 2048M
    depends_on:
      - openclaw-db # Might need to fetch data for inference
    restart: on-failure
    ports:
      - "5000:5000" # For AI inference requests (e.g., a Flask API)
    volumes:
      - ./models:/app/models:ro # Mount pre-trained models read-only

volumes:
  db_data: # Define the named volume for database persistence

networks:
  default: # Docker Compose automatically creates a default network for services
    driver: bridge
Dissecting the docker-compose.yml File
version: '3.8': Specifies the Docker Compose file format version. Version 3 is the latest and most recommended, offering various features and optimizations.services:: This is the core section where you define each component (service) of your OpenClaw application. Each service corresponds to a single container (or set of identical containers for scaling).openclaw-db(PostgreSQL):image: postgres:13-alpine: Uses an official Docker image for PostgreSQL.alpinevariants are lightweight, contributing to faster downloads and lower resource consumption – a subtle nod to cost optimization.environment: Sets environment variables inside the container, crucial for configuring the database.DB_PASSWORDis referenced as a variable, which should be set in a.envfile for security.volumes:db_data:/var/lib/postgresql/dataensures that your database's data persists even if the container is removed or recreated. Named volumes are the preferred way to manage persistent data in Docker Compose. We also definedb_dataat the root level under thevolumes:section.ports:"5432:5432"maps the container's port 5432 to the host's port 5432. This is optional and typically only done if you need to access the database directly from your host machine (e.g., forpsqlclient).restart: always: Ensures the database container automatically restarts if it crashes or the Docker daemon is restarted. This enhances resilience.healthcheck: A critical feature for multi-service applications. It defines a command Docker will execute periodically to determine if the service is healthy. This prevents dependent services from trying to connect to a database that hasn't fully started, which directly contributes to application stability and performance optimization by preventing connection timeouts and retries.
openclaw-processor,openclaw-ingest,openclaw-ui,openclaw-ai: These services represent our application's custom components.build:: Instead ofimage,buildtells Docker Compose to build an image from aDockerfilelocated at the specifiedcontext(path relative to thedocker-compose.ymlfile). This is essential for custom applications.environment: Similar to the database, these define application-specific settings. Note theDATABASE_URLwhich uses the service nameopenclaw-dbfor communication. Docker Compose's default network resolves service names to their respective container IPs.depends_on: This ensures that services start in a specific order. For instance,openclaw-processordepends onopenclaw-dbbeingservice_healthy. This is vital for application robustness.ports: Exposes specific ports of the application services to the host, allowing external access to the UI, APIs, or data ingestion endpoints.volumes: Used here for mapping application logs or configuration files to the host, facilitating debugging and configuration management.rodenotes read-only access.deploy: This section is highly valuable for performance optimization and cost optimization in production. It allows you to specify resource limits (e.g., CPU, memory) for a service. By setting limits, you prevent a single runaway container from monopolizing host resources, ensuring other services remain responsive. Reservations guarantee a minimum amount of resources. This helps in managing cloud costs by preventing over-provisioning and ensuring efficient resource utilization. For instance, ifopenclaw-aiis GPU-intensive, this is where you'd configure GPU access if using Docker's NVIDIA runtime.
volumes:: This top-level section defines named volumes, which are the preferred mechanism for persisting data generated by and used by Docker containers. Named volumes are managed by Docker and are typically stored in a Docker-managed part of the host filesystem. This decouples data from container lifecycles.networks:: Docker Compose automatically creates a default network for all services defined in thedocker-compose.ymlfile. Services on this network can communicate with each other using their service names. You can define custom networks here for more complex isolation or connectivity requirements, thoughdefaultis often sufficient.
Using Environment Variables for Security and Flexibility
Notice the use of ${DB_PASSWORD}, ${AI_API_ENDPOINT}, and ${AI_API_KEY}. It's a critical security and best practice to externalize sensitive information (like passwords, API keys) and configuration settings from your docker-compose.yml file. This is typically done using a .env file placed in the same directory as your docker-compose.yml.
Example .env file:
DB_PASSWORD=YourStrongDatabasePassword123!
AI_API_ENDPOINT=https://api.example.com/ai/v1
AI_API_KEY=sk-your_api_key_here
Docker Compose automatically loads variables from a .env file when you run docker-compose up. This keeps sensitive data out of version control and allows for easy configuration changes across different environments without modifying the docker-compose.yml itself. This modularity not only enhances security but also contributes to flexibility and cost optimization by enabling easy switching between different API providers or database instances.
Initial Deployment: Bringing OpenClaw to Life
With our docker-compose.yml file meticulously crafted and our .env file securely populated, we are ready to initiate the deployment of OpenClaw. This section guides you through the process of building images, starting services, and performing initial verification.
Step 1: Create the Project Directory and Files
Organize your OpenClaw project neatly. Assuming the structure described in the docker-compose.yml, you would have:
openclaw_project/
├── docker-compose.yml
├── .env
├── processor/
│   ├── Dockerfile
│   └── app.py # Or your processor's main code
├── ingest/
│   ├── Dockerfile
│   └── app.js # Or your ingestor's main code
├── ui/
│   ├── Dockerfile
│   └── nginx.conf # Nginx config for UI
│   └── build/ # Your compiled UI assets
├── ai_service/
│   ├── Dockerfile
│   └── api.py # AI inference API
├── logs/ # Directory for host-mapped logs
└── config/ # Directory for host-mapped configs
Create the Dockerfiles for each custom service (processor, ingest, ui, ai_service). A basic Dockerfile for a Python service might look like this:
processor/Dockerfile (Example):
FROM python:3.9-slim-buster
WORKDIR /app
COPY requirements.txt .
RUN pip install --no-cache-dir -r requirements.txt
COPY . .
CMD ["python", "app.py"]
Ensure you have requirements.txt (for Python) or package.json (for Node.js) in your service directories, listing all necessary dependencies.
Step 2: Build and Start Services
Navigate to the openclaw_project/ directory in your terminal where docker-compose.yml and .env are located.
- Build Images and Start Containers: The primary command to bring up your application is
docker compose up.bash docker compose up -d --buildLet's break down this command: *docker compose up: This command tells Docker Compose to build (if necessary) and start the services defined in yourdocker-compose.yml. *-d(or--detach): This runs the containers in "detached" mode, meaning they run in the background, freeing up your terminal. Without this, your terminal would be attached to the logs of the services. *--build: This forces Docker Compose to rebuild images for services that have abuildinstruction (e.g.,openclaw-processor,openclaw-ui). This is crucial if you've made changes to your application code or their respectiveDockerfiles. For subsequent runs without code changes, you can omit--buildfor faster startup.Upon execution, Docker will: * Read your.envfile to load environment variables. * Pull base images (e.g.,postgres:13-alpine) if not already present. * Build custom images based on yourDockerfiles. * Create the default network. * Start containers in the order determined bydepends_onandhealthcheckconditions, ensuring dependencies likeopenclaw-dbare fully ready beforeopenclaw-processorattempts to connect. - Monitor Progress: You'll see output in your terminal indicating the progress of image pulling, building, and container creation. This process might take a few minutes on the first run, especially if many images need to be downloaded or built.
Step 3: Verify Deployment Status
Once docker compose up completes, it's essential to verify that all services are running as expected.
- List Running Containers:
bash docker compose psThis command lists all services defined in yourdocker-compose.ymland their current status, port mappings, and running commands. Look forUpin theSTATEcolumn, possibly with(healthy)for services with health checks.Example Output:NAME COMMAND SERVICE STATUS PORTS openclaw_project-db-1 "docker-entrypoint.s…" openclaw-db running (healthy) 0.0.0.0:5432->5432/tcp openclaw_project-processor-1 "python app.py" openclaw-processor running (healthy) 0.0.0.0:8000->8000/tcp openclaw_project-ingest-1 "node app.js" openclaw-ingest running 0.0.0.0:3000->3000/tcp openclaw_project-ui-1 "/docker-entrypoint.…" openclaw-ui running 0.0.0.0:80->80/tcp, 0.0.0.0:443->443/tcp openclaw_project-ai-1 "python api.py" openclaw-ai running 0.0.0.0:5000->5000/tcp - View Logs: To inspect the real-time output of your services and troubleshoot any startup issues, use the
logscommand:bash docker compose logs -f*docker compose logs: Displays logs from all services. *-f(or--follow): Streams the logs in real-time, similar totail -f. * You can also specify a particular service to view its logs:docker compose logs -f openclaw-processor.Check the logs for any error messages during startup. For database services, confirm successful initialization. For application services, look for messages indicating successful connections to dependencies (e.g., "Connected to PostgreSQL," "AI service ready"). - Access OpenClaw: If
openclaw-uiis mapped to port 80 on your host, you should now be able to access the OpenClaw user interface by navigating tohttp://localhost(or the IP address of your Docker host) in your web browser. Test other API endpoints (e.g.,http://localhost:8000for processor,http://localhost:3000for ingest) as needed.
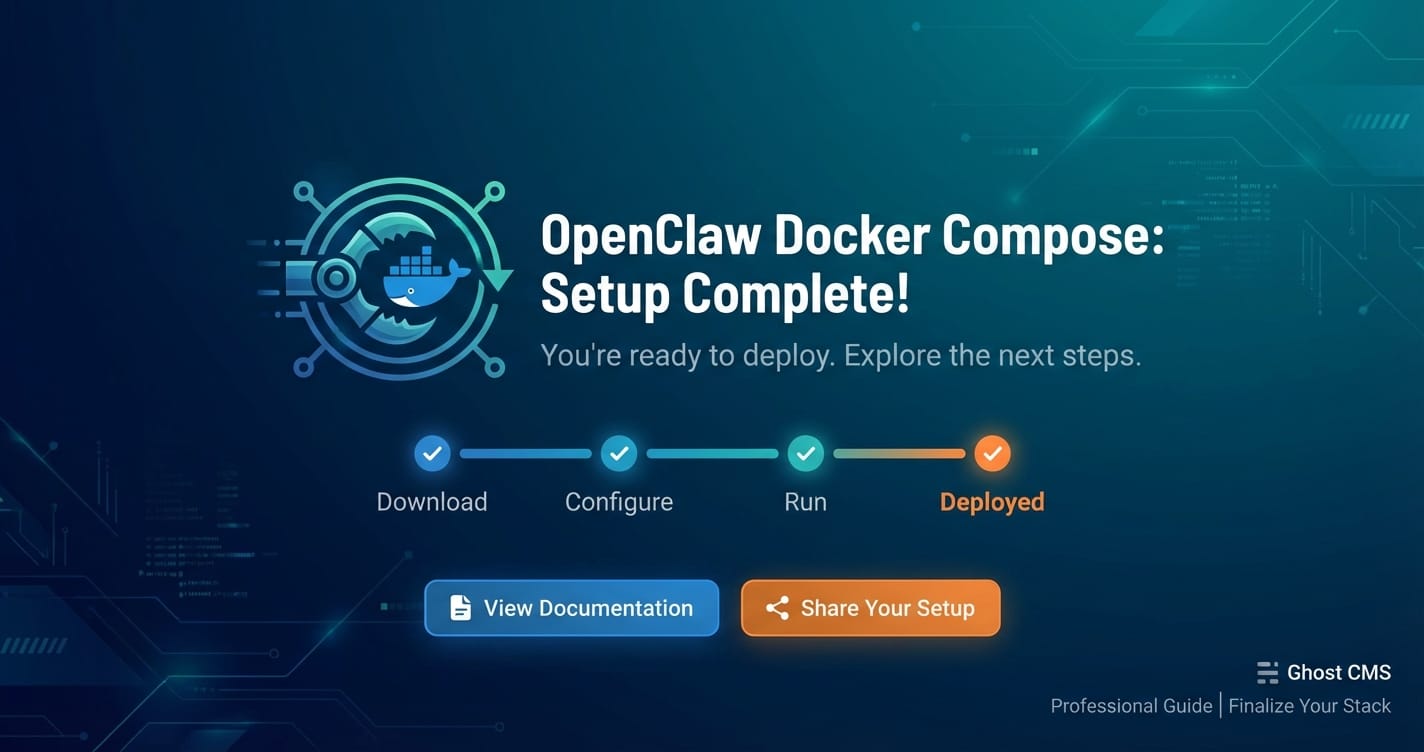
Congratulations! You have successfully deployed your OpenClaw application using Docker Compose. This robust and reproducible setup forms the foundation for further configuration, optimization, and scaling.
Deep Dive into Configuration: Volumes, Networks, and Environment Variables
A truly streamlined and robust OpenClaw deployment requires more than just basic service definitions. Understanding and strategically utilizing Docker Compose's capabilities for volumes, networks, and environment variables is key to achieving maintainability, security, and superior performance optimization.
Persistent Storage with Volumes
Data persistence is critical for stateful services like openclaw-db. As seen, we used a named volume db_data.
- Named Volumes vs. Bind Mounts:
- Named Volumes (Recommended):
db_data:/var/lib/postgresql/data. Docker manages the host path. They are ideal for persistent data, better for backup, and work across different host OSes. They are also easier to manage for multi-host deployments (e.g., with Docker Swarm). - Bind Mounts:
./logs/processor:/app/logs. You explicitly control the host path. Useful for development (e.g., hot-reloading code) or for mapping configuration files from the host into containers.
- Named Volumes (Recommended):
- Volume Best Practices:
- Always use named volumes for critical, persistent data.
- For configuration, consider bind mounts (read-only) or Docker Configs (for Swarm).
- For application logs, bind mounts to a host directory can simplify log aggregation and analysis, contributing to better performance optimization of your monitoring pipeline.
- Plan your volume strategy carefully, especially for backups and disaster recovery.
Inter-Service Communication with Networks
Docker Compose automatically creates a default bridge network for your application. This network allows services to communicate using their service names.
- Service Discovery: Inside a container on the
defaultnetwork,openclaw-dbresolves to the IP address of the PostgreSQL container. This is whyDATABASE_URLusesopenclaw-dbas the hostname. This greatly simplifies configuration compared to managing IP addresses. - Custom Networks: For more complex scenarios, you might define custom networks. ```yaml services: # ... networks: backend: driver: bridge frontend: driver: bridgeopenclaw-processor: # ... networks: - backendopenclaw-ui: # ... networks: - frontend - backend # UI needs to talk to processor via backend network ``` This allows stricter network isolation, separating frontend-facing services from backend services. This is a subtle but effective security measure that also contributes to performance optimization by reducing unnecessary network traffic exposure.
- Network Best Practices:
- For most single-host applications, the default network is perfectly adequate.
- Use custom networks for isolation or if integrating with existing Docker networks.
- Ensure proper firewall rules on your host if exposing ports to the public internet.
Managing Configuration with Environment Variables
Environment variables are the cornerstone of flexible and secure configuration in containerized applications.
.envFile (Local Development/Single-Host Deployment): As discussed, the.envfile is ideal for storing variables locally, especially sensitive ones, keeping them out of version control. Docker Compose automatically loads it.env_fileDirective: You can also explicitly tell a service to load variables from one or more.envfiles. This is useful if you have service-specific environment files.yaml openclaw-processor: # ... env_file: - ./config/processor.env - ./config/common.env # Can load multiple files- Direct
environmentSection: For non-sensitive, static variables, defining them directly in theenvironmentsection of a service is acceptable. - Environment Variable Best Practices:
- NEVER hardcode sensitive information (API keys, passwords) directly in
docker-compose.ymlorDockerfiles. Use.envor, for production, secret management solutions. - Use descriptive variable names.
- Document expected environment variables for each service.
- Leverage environment variables to switch between development, staging, and production configurations, streamlining deployments and supporting cost optimization by using different API endpoints or database sizes.
- NEVER hardcode sensitive information (API keys, passwords) directly in
Example Table: Environment Variables for OpenClaw Services
| Service | Key | Description | Example Value | Sensitive? |
|---|---|---|---|---|
openclaw-db |
POSTGRES_PASSWORD |
Password for the PostgreSQL database user | ${DB_PASSWORD} |
Yes |
openclaw-processor |
DATABASE_URL |
Connection string for the database | postgresql://user:${DB_PASSWORD}@openclaw-db:5432/ |
Yes (part) |
openclaw-processor |
PROCESSOR_THREADS |
Number of concurrent threads for data processing | 4 |
No |
openclaw-processor |
AI_API_ENDPOINT |
URL for the external AI API | ${AI_API_ENDPOINT} |
Yes (part) |
openclaw-processor |
AI_API_KEY |
API key for authentication with external AI service | ${AI_API_KEY} |
Yes |
openclaw-ingest |
PROCESSOR_SERVICE_URL |
Endpoint for sending data to the processor service | http://openclaw-processor:8000/ingest |
No |
openclaw-ui |
API_BASE_URL |
Base URL for the frontend to fetch data from backend APIs | http://localhost:3000 (or proxy URL) |
No |
openclaw-ai |
MODEL_PATH |
Path to the machine learning model file within the container | /app/models/my_model.pt |
No |
openclaw-ai |
GPU_ENABLED |
Flag to enable/disable GPU usage for AI inference (if supported) | true / false |
No |
By meticulously configuring volumes, networks, and environment variables, you establish a robust and adaptable foundation for your OpenClaw deployment, paving the way for advanced features and fine-tuned performance optimization.
Advanced Optimization for Performance and Cost
Deploying OpenClaw with Docker Compose is just the beginning. To truly extract maximum value from your setup, especially in production environments, you must actively pursue strategies for performance optimization and cost optimization. These two goals are often intertwined, as efficient resource usage directly translates to lower operational expenditures.
Resource Allocation and Limits
As hinted in the deploy section of our docker-compose.yml, carefully managing resource allocation is crucial.
- CPU and Memory Limits:
yaml openclaw-ai: deploy: resources: limits: cpus: '2.0' # Container cannot use more than 2 CPU cores memory: 4096M # Container cannot use more than 4GB RAM reservations: cpus: '1.0' # Guarantees 1 CPU core for the container memory: 2048M # Guarantees 2GB RAM for the container- Limits (
limits): Prevent a single misbehaving service (e.g., a memory leak or an infinite loop) from consuming all host resources, leading to system instability and impacting other services' performance optimization. This is a critical factor for application stability. - Reservations (
reservations): Guarantee a minimum amount of resources. If your host is under heavy load, Docker will prioritize these services to ensure they always have their reserved resources, preventing performance degradation for critical components. Cost Optimization Benefit: By setting realistic limits and reservations, you avoid over-provisioning your cloud instances. Instead of blindly allocating a large VM, you can right-size your instances based on the aggregated resource needs of your containers, leading to significant cost optimization.
- Limits (
- Understanding Service Resource Needs: Thorough profiling of each OpenClaw service is essential.
- How much CPU does
openclaw-processorconsume during peak load? - What is the memory footprint of
openclaw-aiwhen loading a large model? - Is
openclaw-ingestCPU-bound or I/O-bound? Tools likedocker stats(for live monitoring), Prometheus/Grafana (for historical data), or application-specific profiling tools can provide these insights.
- How much CPU does
Image Optimization
The size and efficiency of your Docker images directly impact build times, deployment speed, and disk usage.
- Use Alpine-based Images: As seen with
postgres:13-alpine, Alpine Linux is a minimalist Linux distribution. Usingalpinetags for base images where possible significantly reduces image size. .dockerignoreFile: Similar to.gitignore, a.dockerignorefile prevents unnecessary files (e.g.,.gitdirectories,node_modulesif already installed, IDE files) from being copied into the build context, speeding up builds and reducing image size.
Multi-Stage Builds: This technique significantly reduces image size by separating build-time dependencies from runtime dependencies. Example Dockerfile (for openclaw-processor): ```dockerfile # Stage 1: Build stage FROM python:3.9-slim-buster as builder WORKDIR /app COPY requirements.txt . RUN pip install --no-cache-dir -r requirements.txt
Stage 2: Runtime stage
FROM python:3.9-slim-buster WORKDIR /app COPY --from=builder /usr/local/lib/python3.9/site-packages /usr/local/lib/python3.9/site-packages COPY . . CMD ["python", "app.py"] `` In this example, thebuilderstage installs all Python packages. The final image then only copies the installed packages and your application code, omitting the build tools (likepip` itself and temporary build files), resulting in a much smaller, more secure, and faster-to-deploy image. This directly contributes to performance optimization during deployment and storage cost optimization.
Database Optimization
The database is often the bottleneck in many applications.
- Proper Indexing: Ensure your
openclaw-dbhas appropriate indexes for frequently queried columns. - Query Optimization: Review and optimize SQL queries issued by
openclaw-processorandopenclaw-ingest. - Connection Pooling: Configure connection pooling in your application services to efficiently manage database connections, reducing overhead and improving performance optimization.
- Caching: Implement caching layers (e.g., Redis) for frequently accessed data that doesn't change often. This can offload the database and dramatically improve response times. You could easily add a
redisservice to yourdocker-compose.yml.
Network Optimization
Efficient inter-container communication is vital.
- Keep Traffic Internal: Wherever possible, container-to-container communication should stay within the Docker network rather than being routed through the host's network interfaces. This minimizes latency and maximizes throughput, a direct win for performance optimization.
- Minimize External Expositions: Only expose ports to the host that absolutely need to be accessible from outside the Docker environment (e.g.,
openclaw-ui's port 80). Reducing exposed ports enhances security and simplifies network management, indirectly aiding cost optimization by reducing attack surface and management overhead.
Logging and Monitoring
While essential for debugging, extensive logging can generate significant disk I/O and storage costs.
- Structured Logging: Use structured logging (e.g., JSON logs) for easier parsing and analysis by log aggregation systems (e.g., ELK stack, Splunk).
- Log Retention Policies: Implement strict log retention policies to prevent logs from consuming excessive disk space, contributing to cost optimization.
- Centralized Logging: Forward logs to a centralized logging solution instead of relying solely on host-mounted volumes for long-term storage, which is more robust and scalable.
By meticulously applying these advanced optimization techniques, your OpenClaw Docker Compose deployment will not only be robust and stable but also incredibly efficient, delivering superior performance while keeping operational costs in check.
Securing Your OpenClaw Deployment
Security is not an afterthought; it's an integral part of a professional OpenClaw Docker Compose deployment. A streamlined setup must also be a secure setup. Neglecting security can lead to data breaches, service disruptions, and significant financial and reputational damage.
Principles of Least Privilege
Apply the principle of least privilege to all components of your OpenClaw deployment.
- Restricted File Permissions: Ensure that files and directories inside your containers have appropriate permissions. Your application user should only have read/write access to what it absolutely needs.
Non-Root Users in Containers: By default, processes inside a Docker container run as root. This is a significant security risk. Always create and use a dedicated non-root user within your Dockerfiles.Example Dockerfile modification: ```dockerfile FROM python:3.9-slim-buster WORKDIR /app COPY requirements.txt . RUN pip install --no-cache-dir -r requirements.txt
Create a non-root user
RUN addgroup --system appgroup && adduser --system --ingroup appgroup appuser USER appuserCOPY . . CMD ["python", "app.py"] ``` This ensures that if an attacker compromises a container, they won't automatically have root privileges within that container, limiting the blast radius.
Network Security
- Internal Communication: Keep inter-service communication within the Docker network. Avoid exposing ports to the host unless absolutely necessary.
- Firewall Rules: If you must expose ports (e.g.,
openclaw-uion port 80/443), configure host firewall rules (e.g.,ufwon Linux, Windows Firewall) to restrict access to trusted IP addresses or networks. Never expose critical services (likeopenclaw-db's 5432) directly to the public internet without strong authentication and IP whitelisting. - HTTPS for UI/API: For any user-facing UI or public API endpoints (
openclaw-ui,openclaw-processorif public), implement HTTPS using certificates. You can use a reverse proxy like Nginx or Caddy (running in its own container) to handle SSL termination.
Secret Management
Sensitive information like database passwords, API keys (especially for api ai services), and private certificates should never be hardcoded or stored directly in your docker-compose.yml or .env files in a production environment.
- Docker Secrets (for Docker Swarm/Kubernetes): For production, these are the preferred method. Docker Secrets inject sensitive data as files into containers at runtime, which are then mounted into the container's filesystem in memory (or a temporary filesystem) and are not directly exposed as environment variables.
- External Secret Stores: Integrate with external secret management services like HashiCorp Vault, AWS Secrets Manager, Google Secret Manager, or Azure Key Vault. Your application or an entrypoint script would then retrieve secrets at runtime.
- Avoid Environment Variables for Production Secrets: While
.envis convenient for development, environment variables can be easily exposed through container inspection (docker inspect) or process lists, making them unsuitable for production secrets.
Image Vulnerability Scanning
- Regular Scanning: Regularly scan your Docker images for known vulnerabilities using tools like Trivy, Clair, or integrated features in Docker Desktop/Docker Hub.
- Keep Base Images Updated: Always use specific, stable versions of base images (e.g.,
python:3.9-slim-buster, notpython:latest) and update them periodically to patch security vulnerabilities. - Minimize Dependencies: Only install necessary dependencies in your Dockerfiles. Each added package increases the attack surface.
Docker Daemon Security
- Restrict Access: The Docker daemon API should not be exposed to the public internet. Access should be restricted to trusted users and processes on the host machine.
- Update Docker Regularly: Keep your Docker Engine and Docker Compose installations up to date to benefit from the latest security patches.
By weaving these security considerations into every stage of your OpenClaw Docker Compose deployment, you build a resilient and trustworthy application environment, protecting your data and ensuring the continuous availability of your services.
Monitoring and Logging Best Practices
A well-deployed OpenClaw application, especially one focused on performance optimization and potentially interacting with api ai services, is only truly complete with robust monitoring and logging. These are your eyes and ears into the application's health, performance, and operational efficiency.
Centralized Logging
Scattering logs across individual container file systems makes troubleshooting a nightmare.
Docker Logging Drivers: Docker provides various logging drivers (e.g., json-file, syslog, fluentd, awslogs, gcp_logging). Configure your docker-compose.yml to send logs to a centralized aggregation system.```yaml services: openclaw-processor: # ... logging: driver: "json-file" # Default, stores logs as JSON on host # driver: "fluentd" # Example for Fluentd # options: # fluentd-address: localhost:24224 # tag: openclaw.processor
If using Fluentd, you might add it as a service:
fluentd:
image: fluent/fluentd:latest
ports:
- "24224:24224"
volumes:
- ./fluentd/config:/fluentd/etc
restart: always
`` * **ELK Stack (Elasticsearch, Logstash, Kibana) or Grafana Loki:** These are popular open-source solutions for collecting, parsing, storing, and visualizing logs. Shipping your container logs to such a stack provides invaluable insights. * **Structured Logging:** Ensure your application services (openclaw-processor,openclaw-ingest,openclaw-ai`) emit structured logs (e.g., JSON). This makes parsing and querying logs in your centralized system significantly easier and more reliable.
Performance Monitoring with Prometheus and Grafana
For real-time and historical performance optimization insights, Prometheus and Grafana form a powerful duo.
- Prometheus: A time-series database and monitoring system. It scrapes metrics from configured targets at given intervals.
cAdvisor: A Docker container that collects resource usage and performance metrics from containers (CPU, memory, network I/O, disk I/O). Prometheus can scrape metrics fromcAdvisor.- Node Exporter: For host-level metrics.
- Application-level Exporters: Your OpenClaw services might expose their own custom metrics (e.g., number of processed items, api ai request latency, database query times) via a Prometheus-compatible endpoint. Libraries exist for most programming languages to facilitate this.
Grafana: A leading open-source platform for querying, visualizing, and alerting on metrics. It integrates seamlessly with Prometheus. You can create rich dashboards to monitor the health and performance optimization of your entire OpenClaw stack.Simplified docker-compose.yml fragment for monitoring: ```yaml
... other services ...
prometheus: image: prom/prometheus:latest volumes: - ./prometheus:/etc/prometheus - prometheus_data:/prometheus command: - '--config.file=/etc/prometheus/prometheus.yml' - '--storage.tsdb.path=/prometheus' ports: - "9090:9090" restart: alwaysgrafana: image: grafana/grafana:latest volumes: - grafana_data:/var/lib/grafana environment: GF_SECURITY_ADMIN_USER: admin GF_SECURITY_ADMIN_PASSWORD: ${GRAFANA_ADMIN_PASSWORD} ports: - "3000:3000" restart: always depends_on: - prometheuscadvisor: image: gcr.io/cadvisor/cadvisor:latest ports: - "8080:8080" volumes: - /:/rootfs:ro - /var/run:/var/run:rw - /sys:/sys:ro - /var/lib/docker/:/var/lib/docker:ro - /dev/disk/:/dev/disk:ro privileged: true # Required for cAdvisor container_name: cadvisor restart: alwaysvolumes: # ... other volumes ... prometheus_data: grafana_data: `` You would then configureprometheus/prometheus.ymlto scrapecadvisor` and your OpenClaw application services if they expose metrics.
Alerting
Mere monitoring is reactive. Proactive alerting is crucial. * Configure alerts in Grafana or Prometheus Alertmanager for critical thresholds (e.g., openclaw-processor CPU usage > 90% for 5 minutes, openclaw-db connection errors, high api ai latency). * Integrate alerts with notification channels like Slack, PagerDuty, email, or custom webhooks.
By implementing these monitoring and logging best practices, you gain unprecedented visibility into your OpenClaw deployment, enabling rapid troubleshooting, informed capacity planning, and continuous performance optimization. This proactive stance is invaluable for maintaining application health and ensuring cost optimization by identifying and resolving inefficiencies before they escalate.
Integrating with AI Capabilities and APIs
Given the keywords provided, especially "api ai", it's crucial to discuss how OpenClaw, as a modern application, can effectively integrate with advanced AI capabilities and external api ai services. Docker Compose provides a flexible and robust environment for managing these integrations, supporting both internal AI modules and external API consumption. This is also where we can naturally introduce XRoute.AI.
Internal AI Inference Service (openclaw-ai)
As designed in our docker-compose.yml, openclaw-ai represents a dedicated service for running machine learning models locally within your Docker Compose stack.
- Model Management:
- Mount models as read-only volumes (e.g.,
./models:/app/models:ro) to keep them separate from the container image and easily update them without rebuilding the image. - Consider using a model serving framework (e.g., FastAPI, Flask, TensorFlow Serving, TorchServe) within
openclaw-aito expose inference endpoints.
- Mount models as read-only volumes (e.g.,
- Hardware Acceleration (GPU): If your host machine has an NVIDIA GPU and you need GPU acceleration for
openclaw-ai(common for deep learning models), you'll need to use the NVIDIA Container Toolkit.- Install the NVIDIA Docker runtime on your host.
- Modify the
openclaw-aiservice indocker-compose.yml:yaml openclaw-ai: # ... deploy: resources: reservations: devices: - driver: nvidia count: all # or specify GPU IDs, e.g., '0' capabilities: [gpu]This ensures that youropenclaw-aicontainer has access to the GPU resources, critical for performance optimization of compute-intensive AI workloads.
Consuming External API AI Services
Many AI capabilities are provided as cloud-based services (e.g., OpenAI, Google Cloud AI, AWS AI/ML services). Your openclaw-processor or openclaw-ingest services might need to interact with these external api ai endpoints.
- API Key Management: As discussed under security, never hardcode API keys. Use environment variables loaded from a
.envfile or, for production, a dedicated secret management solution. - Rate Limiting and Retries: External api ai services often have rate limits. Implement robust rate limiting and exponential backoff/retry mechanisms in your client code to handle transient errors and avoid exceeding quotas. This directly impacts performance optimization by ensuring reliable API interactions.
- Latency and Throughput: Monitor the latency of your api ai calls. High latency can severely impact your application's responsiveness. Consider regional API endpoints or alternative providers for performance optimization.
The Role of Unified API Platforms: Introducing XRoute.AI
Managing multiple api ai integrations, each with its own authentication, rate limits, and client libraries, can become complex and error-prone. This complexity is amplified when you want to switch between different large language models (LLMs) or providers for cost optimization or performance optimization.
For applications like OpenClaw that may interact with diverse AI models or require robust API management for their AI components, platforms like XRoute.AI offer a unified solution. XRoute.AI is a cutting-edge unified API platform designed to streamline access to large language models (LLMs) for developers, businesses, and AI enthusiasts. By providing a single, OpenAI-compatible endpoint, XRoute.AI simplifies the integration of over 60 AI models from more than 20 active providers, enabling seamless development of AI-driven applications, chatbots, and automated workflows.
How XRoute.AI can benefit your OpenClaw deployment: * Simplified Integration: Instead of writing custom code for each api ai provider, openclaw-processor can interact with a single XRoute.AI endpoint, which then intelligently routes requests to the best-performing or most cost-effective AI model based on your configuration. This dramatically reduces integration complexity. * Low Latency AI: XRoute.AI focuses on low latency AI, ensuring your openclaw-processor or openclaw-ai (if it acts as a proxy) receives responses quickly, which is crucial for real-time analytics or interactive AI features. * Cost-Effective AI: The platform allows you to optimize for cost-effective AI by automatically routing requests to the cheapest available provider for a given model or task, without changing your application code. This is a significant factor in cost optimization for AI-heavy workloads. * Performance Optimization: With features like smart routing, caching, and load balancing across multiple providers, XRoute.AI inherently boosts the performance optimization of your AI interactions. * Scalability: XRoute.AI's high throughput and scalability ensure that your OpenClaw application can handle increasing volumes of AI requests without becoming a bottleneck.
Integrating XRoute.AI into your OpenClaw setup would involve configuring your openclaw-processor (or a dedicated AI proxy service) to use the XRoute.AI endpoint and API key, abstracting away the complexities of managing multiple LLM providers. This enables your OpenClaw application to leverage state-of-the-art AI capabilities with unparalleled ease and efficiency, solidifying its position as a truly modern, high-performance system.
Scaling OpenClaw for Production Workloads
While Docker Compose is excellent for local development and single-host deployments, scaling OpenClaw for production workloads often requires moving beyond a single host. However, even on a single host, Docker Compose offers basic scaling capabilities. For larger-scale, highly available deployments, understanding the next steps is crucial.
Scaling Services within Docker Compose
You can scale individual services on a single Docker host using the docker compose up --scale command.
docker compose up -d --scale openclaw-processor=4
This command would start four instances of the openclaw-processor service. Docker Compose will automatically distribute incoming requests to these instances within its internal network.
- Considerations for Scaling:
- Statelessness: Services that you intend to scale (like
openclaw-processor,openclaw-ingest,openclaw-ai) should ideally be stateless. This means they don't store session data or unique identifiers locally. All state should reside in persistent storage (e.g.,openclaw-db, Redis). - Load Balancing: While Docker Compose provides basic internal load balancing, for external traffic, you would typically place a reverse proxy (like Nginx or HAProxy) in front of your scaled services, especially
openclaw-uior any public API. - Resource Availability: Ensure your Docker host has enough CPU, RAM, and disk I/O to support the increased number of containers. Over-scaling on an under-resourced host will lead to performance degradation, not performance optimization.
- Statelessness: Services that you intend to scale (like
Moving to Orchestration Platforms (Next Steps)
For true production-grade scaling, high availability, and fault tolerance across multiple hosts, you would graduate from Docker Compose to a full-fledged container orchestration platform.
- Docker Swarm: Docker Swarm is Docker's native clustering and orchestration solution.
docker-compose.ymlfiles are largely compatible with Swarm (used as "stack files"). Swarm provides features like:- Multi-host Scaling: Distribute services across multiple physical or virtual machines.
- Built-in Load Balancing: Automatic load balancing for services.
- Rolling Updates: Update services without downtime.
- Self-healing: Automatically restart failed containers on healthy nodes.
- Kubernetes: Kubernetes is the industry-standard container orchestration platform. While it has a steeper learning curve, it offers unparalleled power, flexibility, and a vast ecosystem.
- Resource Management: Advanced resource scheduling and management across a cluster.
- Auto-scaling: Automatically adjust the number of service replicas based on load.
- Service Discovery: Robust service discovery and load balancing.
- Advanced Networking: Sophisticated networking capabilities for complex applications.
- Rich Ecosystem: A massive ecosystem of tools and integrations.
Transitioning from Docker Compose to Swarm or Kubernetes involves converting your docker-compose.yml definitions into their respective configuration formats (e.g., Stack files for Swarm, YAML manifests for Kubernetes). The modularity and containerization provided by your initial Docker Compose setup make this transition significantly smoother than with traditional deployment methods. This planned evolution ensures that your OpenClaw application can scale seamlessly to meet future demands, always keeping performance optimization and cost optimization at the forefront.
Maintenance, Updates, and Troubleshooting
A streamlined setup isn't just about initial deployment; it also encompasses the ongoing maintenance, updating, and efficient troubleshooting of your OpenClaw application. Docker Compose greatly simplifies these tasks, but understanding the best practices is crucial.
Updating Services and Images
Keeping your OpenClaw services and their base images up-to-date is vital for security, stability, and benefiting from performance optimization improvements.
- Update Base Images: Periodically check for new versions of base images (e.g.,
postgres:14-alpine,python:3.10-slim-buster). Update yourdocker-compose.ymlorDockerfiles accordingly. - Rebuild Custom Images: If you've updated your application code or a
Dockerfile, you need to rebuild the corresponding image.bash docker compose build openclaw-processor # Build specific service docker compose build # Build all services - Update and Restart Services: After images are rebuilt or base images updated, bring down and up your services to use the new images.
bash docker compose up -d --build --force-recreate--build: Ensures new images are built ifDockerfiles have changed.--force-recreate: Forces Docker Compose to stop and recreate all containers, ensuring they pick up the latest image changes. Without this, Docker Compose might reuse existing containers if no changes are detected in the service configuration itself.
- Rolling Updates (for production): For zero-downtime updates in production, you would need Docker Swarm or Kubernetes. Docker Compose by itself does not offer rolling updates on a single host without brief downtime.
Managing Data and Volumes
- Backup Strategy: Implement a robust backup strategy for your
db_datavolume. This might involve:- Using Docker volumes backup tools (e.g.,
docker run --rm --volumes-from openclaw_project-db-1 -v $(pwd):/backup ubuntu tar cvf /backup/backup.tar /var/lib/postgresql/data). - Using database-specific backup tools (e.g.,
pg_dumpfrom a temporary container). - Regularly backing up the host directory where Docker volumes reside.
- Using Docker volumes backup tools (e.g.,
- Volume Cleanup: Regularly prune unused Docker volumes to reclaim disk space, contributing to cost optimization.
bash docker volume prune
Troubleshooting Common Issues
- Container Fails to Start:
- Check
docker compose logs <service_name>immediately for error messages during startup. - Verify environment variables in your
.envfile are correct. - Check
Dockerfilefor errors during image build. - Ensure port bindings are not already in use on the host.
- Check
- Service Cannot Connect to Dependency:
- Verify
depends_onandhealthcheckconfigurations. Is the dependent service actuallyhealthy? - Check network configuration. Can containers resolve each other by service name? (
docker exec <container_id> ping <other_service_name>). - Firewall on the host might be blocking inter-container communication if custom networks are used or if a service tries to connect to an exposed port on
localhost.
- Verify
- Application Slow/Unresponsive:
- Use
docker compose psanddocker statsto check CPU, memory, and network usage of individual containers. Identify potential bottlenecks. This directly points to areas for performance optimization. - Review application logs for errors, excessive database queries, or long-running processes.
- Check host resources (CPU, RAM, disk I/O). Is the host itself overloaded? This highlights areas for cost optimization if you are over-provisioning or under-provisioning.
- Use
- Disk Space Issues:
- Docker can consume a lot of disk space. Regularly run
docker system pruneto remove unused images, containers, and networks. - Monitor log file sizes, especially if using
json-filedriver without rotation.
- Docker can consume a lot of disk space. Regularly run
Debugging Containers
- Interactive Shell: Access a running container for inspection:
bash docker exec -it <container_name_or_id> bash # or sh if bash is not available (common in alpine images)From within the container, you can check file systems, run commands, inspect network connectivity, and debug your application. - One-off Commands: Run a command in a new container based on a service's image:
bash docker compose run openclaw-db psql -h openclaw-db -U openclaw_user openclaw_dataThis is useful for database migrations, data inspection, or running utility scripts.
By mastering these maintenance, update, and troubleshooting techniques, you ensure your OpenClaw Docker Compose deployment remains robust, up-to-date, and resilient, minimizing downtime and maximizing operational efficiency. This proactive approach contributes significantly to both performance optimization and long-term cost optimization.
Best Practices for Robust OpenClaw Deployments
To ensure your OpenClaw Docker Compose deployment is not only streamlined but also robust, maintainable, and ready for future growth, adhering to a set of best practices is essential. These recommendations distill the wisdom gained from countless containerized deployments.
- Version Everything (Code, Dockerfiles,
docker-compose.yml):- Your application code,
Dockerfiles, anddocker-compose.ymlfile should all be under version control (e.g., Git). This allows for easy tracking of changes, collaboration, and rollbacks to previous stable states. - Use specific image tags (e.g.,
python:3.9-slim-buster,postgres:13-alpine), notlatest, to ensure reproducible builds. Update tags only after thorough testing.
- Your application code,
- Externalize Configuration:
- As detailed, use
.envfiles for local development and dedicated secret management systems (like Docker Secrets or external Vaults) for production. - Avoid baking configuration directly into Docker images. This makes images more reusable and adaptable to different environments.
- As detailed, use
- Implement Health Checks:
- Crucial for services that have dependencies (e.g., database). Health checks prevent dependent services from trying to connect to components that aren't fully ready, improving application startup reliability and performance optimization.
- Manage Persistent Data with Named Volumes:
- Always use named volumes for any data that needs to persist beyond the life of a container (e.g., databases, user uploads). This decouples data from the container lifecycle.
- Plan for volume backups and disaster recovery.
- Prioritize Image Optimization:
- Employ multi-stage builds to create smaller, more secure, and faster-to-deploy images.
- Use lightweight base images (e.g., Alpine variants).
- Leverage
.dockerignoreto exclude unnecessary files from your build context. This contributes to faster builds and storage cost optimization.
- Secure Your Deployment:
- Run containers as non-root users.
- Restrict exposed ports to only what's necessary.
- Implement host firewall rules.
- Use HTTPS for all external communications.
- Regularly scan images for vulnerabilities.
- Implement Robust Logging and Monitoring:
- Use structured logging from your application services.
- Forward logs to a centralized logging system.
- Deploy a monitoring stack (e.g., Prometheus/Grafana) to track key metrics for performance optimization and system health.
- Set up alerts for critical issues.
- Understand Resource Requirements:
- Profile your application services to understand their CPU, memory, and I/O demands.
- Use
deploy.resources.limitsanddeploy.resources.reservationsin yourdocker-compose.ymlto prevent resource hogging and ensure predictable performance. This directly supports cost optimization by facilitating right-sizing your infrastructure.
- Automate Wherever Possible:
- Automate testing, building, and deployment processes using Continuous Integration/Continuous Deployment (CI/CD) pipelines. Even for Docker Compose, a simple script can rebuild and redeploy.
- Plan for Scalability and Orchestration:
- Design your OpenClaw services to be stateless where possible.
- Understand the limitations of Docker Compose for multi-host scaling and high availability. Be prepared to transition to Docker Swarm or Kubernetes as your application grows, maintaining performance optimization and reliability at scale.
By meticulously following these best practices, your OpenClaw Docker Compose setup will be a testament to engineering excellence – a powerful, efficient, secure, and maintainable foundation for your application. This disciplined approach ensures that your initial streamlined setup evolves into a resilient and adaptable system, capable of meeting the demands of modern application development.
Conclusion
The journey through setting up OpenClaw with Docker Compose has illuminated a path toward unparalleled efficiency, consistency, and control in application deployment. We've explored how Docker containers encapsulate your application and its dependencies, eliminating the perennial "it works on my machine" problem, and how Docker Compose orchestrates these containers into a cohesive, multi-service application. From crafting the intricate docker-compose.yml blueprint to the initial deployment, and from deep dives into configuration to advanced strategies for performance optimization and cost optimization, this guide has provided a holistic framework for success.
We emphasized the criticality of a well-structured docker-compose.yml for defining services, networks, and volumes, alongside the indispensable role of environment variables for secure and flexible configuration. Our exploration extended to the nuances of securing your deployment, underscoring the importance of non-root users, robust secret management, and network isolation. Furthermore, the power of comprehensive monitoring and logging with tools like Prometheus and Grafana was highlighted as essential for maintaining operational health and proactively addressing performance bottlenecks.
Crucially, we integrated the concept of api ai and the strategic advantages of unified API platforms like XRoute.AI. For an application like OpenClaw, which may leverage diverse AI models for advanced analytics, XRoute.AI offers a streamlined, cost-effective, and high-performance gateway to over 60 LLMs. This integration not only simplifies the development of AI-driven features but also optimizes their cost and latency, ensuring your OpenClaw application remains at the forefront of intelligent solutions.
Finally, we discussed scaling strategies and best practices for ongoing maintenance, updates, and troubleshooting, preparing your OpenClaw deployment for growth and long-term stability. By adopting these principles, you're not just deploying an application; you're building a resilient, adaptable, and highly efficient system that leverages the full power of containerization. The streamlined setup of OpenClaw with Docker Compose is more than a technical procedure; it's an investment in a future where deployment is a competitive advantage, not a bottleneck.
Frequently Asked Questions (FAQ)
1. What is OpenClaw, and why should I use Docker Compose for its deployment? OpenClaw, as conceived in this guide, is a complex, modular application (e.g., for data analysis, monitoring, or AI-driven tasks) composed of multiple interdependent services. You should use Docker Compose for its deployment because it provides a declarative, reproducible, and streamlined way to define, run, and manage multi-container applications. It simplifies dependency management, ensures environmental consistency, and drastically reduces setup time compared to traditional methods, directly contributing to cost optimization and performance optimization.
2. How does Docker Compose help with performance optimization and cost optimization for OpenClaw? Docker Compose facilitates performance optimization by allowing you to define explicit resource limits (CPU, memory) for each service, preventing resource contention and ensuring critical services remain responsive. Health checks ensure services start in the correct order, avoiding connection issues. For cost optimization, by right-sizing your container resources with limits and reservations, you avoid over-provisioning underlying infrastructure. Furthermore, image optimization (multi-stage builds, Alpine images) reduces storage costs and deployment times. Integrating platforms like XRoute.AI for api ai interactions can also route requests to the most cost-effective AI models, further optimizing operational expenses.
3. What is the .env file, and why is it important for security? The .env file is a plain text file that contains environment variables, often including sensitive information like database passwords (DB_PASSWORD) or api ai keys (AI_API_KEY). It's important for security because it allows you to keep sensitive data out of your version-controlled docker-compose.yml file and Dockerfiles. Docker Compose automatically loads these variables, making your configurations flexible and secure, especially in development environments. For production, more robust secret management solutions are recommended.
4. Can I scale OpenClaw using Docker Compose, and what are the limitations? Yes, you can scale individual services within your Docker Compose setup on a single host using the docker compose up --scale <service_name>=<count> command. This is useful for horizontally scaling stateless components like openclaw-processor. The limitations are that Docker Compose alone doesn't provide multi-host orchestration, high availability across machines, or advanced features like rolling updates with zero downtime. For true production-grade scaling and fault tolerance across a cluster, you would need to transition to platforms like Docker Swarm or Kubernetes.
5. How does XRoute.AI fit into an OpenClaw deployment, especially concerning "api ai" keywords? If OpenClaw (particularly openclaw-processor or openclaw-ai) interacts with external large language models or other AI APIs, XRoute.AI can significantly streamline these integrations. It acts as a unified API platform, offering a single endpoint to access over 60 AI models from multiple providers. This simplifies development, provides low latency AI, and enables cost-effective AI by automatically routing requests to optimized providers. For your OpenClaw deployment, this means simpler configuration, improved performance optimization for AI interactions, and better cost optimization by leveraging XRoute.AI's intelligent routing capabilities.
🚀You can securely and efficiently connect to thousands of data sources with XRoute in just two steps:
Step 1: Create Your API Key
To start using XRoute.AI, the first step is to create an account and generate your XRoute API KEY. This key unlocks access to the platform’s unified API interface, allowing you to connect to a vast ecosystem of large language models with minimal setup.
Here’s how to do it: 1. Visit https://xroute.ai/ and sign up for a free account. 2. Upon registration, explore the platform. 3. Navigate to the user dashboard and generate your XRoute API KEY.
This process takes less than a minute, and your API key will serve as the gateway to XRoute.AI’s robust developer tools, enabling seamless integration with LLM APIs for your projects.
Step 2: Select a Model and Make API Calls
Once you have your XRoute API KEY, you can select from over 60 large language models available on XRoute.AI and start making API calls. The platform’s OpenAI-compatible endpoint ensures that you can easily integrate models into your applications using just a few lines of code.
Here’s a sample configuration to call an LLM:
curl --location 'https://api.xroute.ai/openai/v1/chat/completions' \
--header 'Authorization: Bearer $apikey' \
--header 'Content-Type: application/json' \
--data '{
    "model": "gpt-5",
    "messages": [
        {
            "content": "Your text prompt here",
            "role": "user"
        }
    ]
}'
With this setup, your application can instantly connect to XRoute.AI’s unified API platform, leveraging low latency AI and high throughput (handling 891.82K tokens per month globally). XRoute.AI manages provider routing, load balancing, and failover, ensuring reliable performance for real-time applications like chatbots, data analysis tools, or automated workflows. You can also purchase additional API credits to scale your usage as needed, making it a cost-effective AI solution for projects of all sizes.
Note: Explore the documentation on https://xroute.ai/ for model-specific details, SDKs, and open-source examples to accelerate your development.